Reports Page
The Reports page allows you to generate and send a screenshot of the Explore page with predefined parameters, enabling you to monitor metrics at your desired frequency. To create a report, follow these steps from the Explore page:
First, go to the Explore page to access the data you want to include in your report.
Now, you can proceed with creating and configuring your report.
How to Create a Report
Click the "Add Report" button on the Explore page.

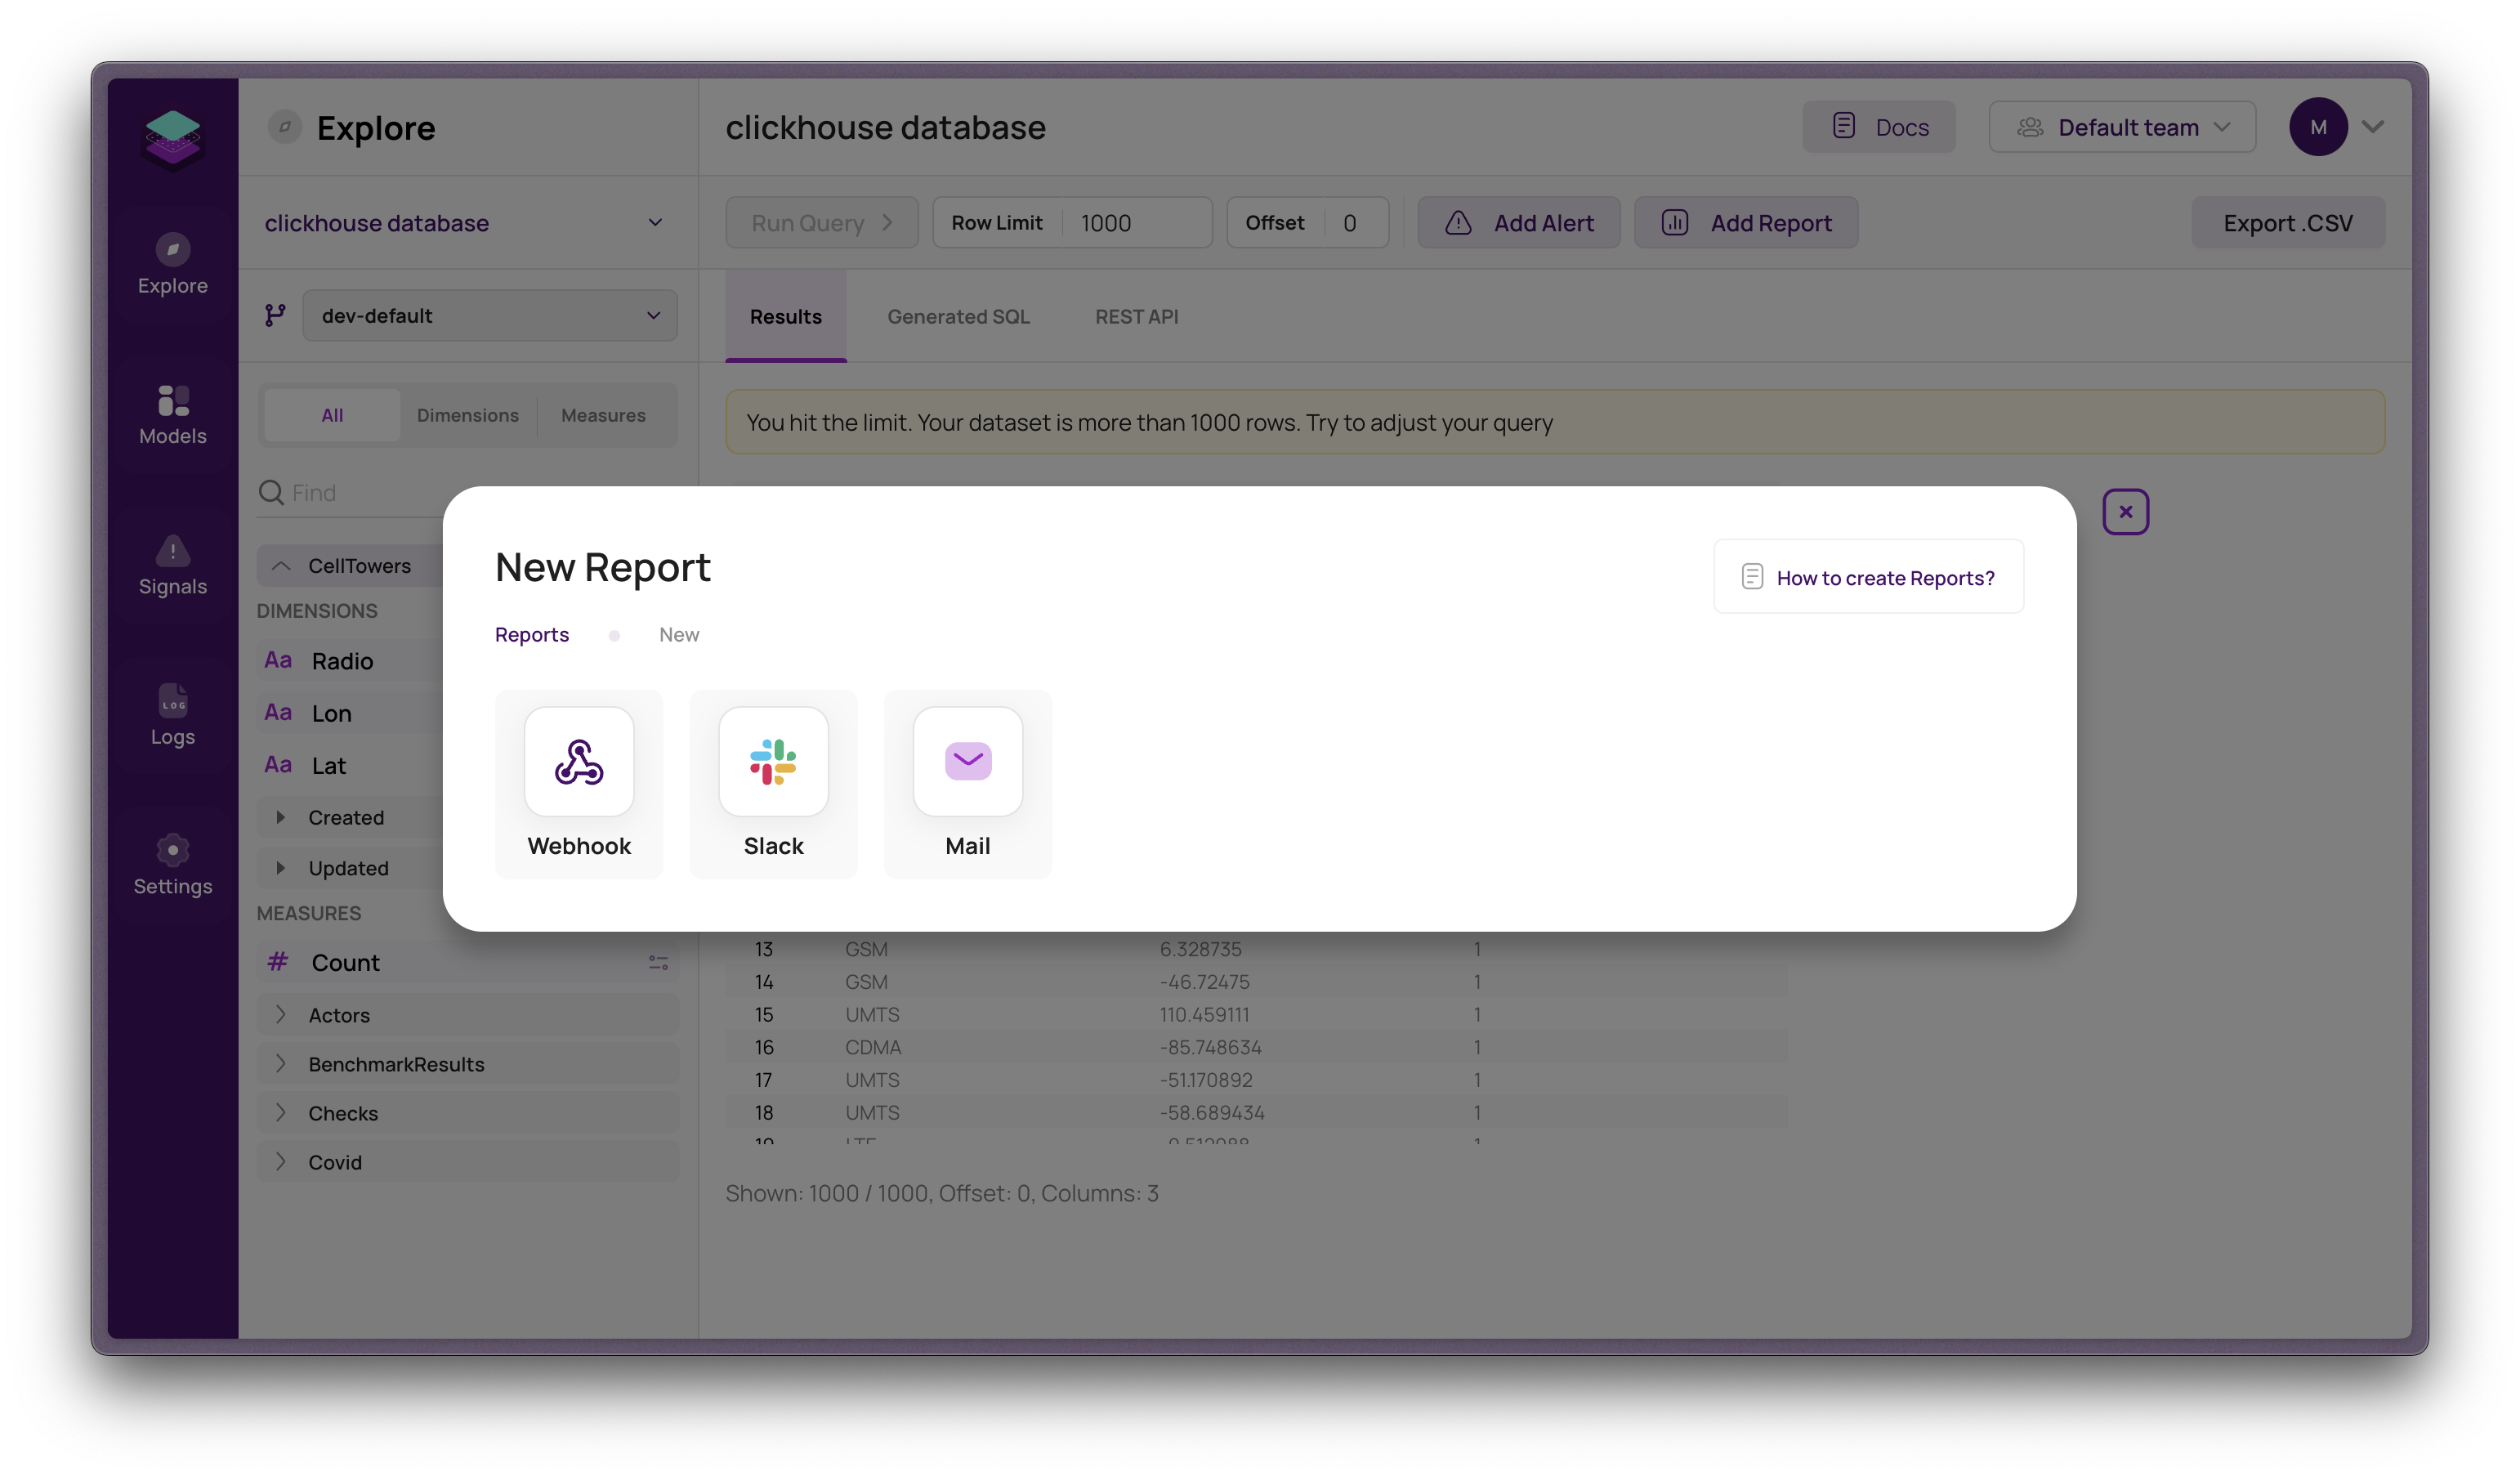
Select the destination where the screenshot will be sent. You can choose between Webhook, Slack, or Email based on your preferences and integrations.

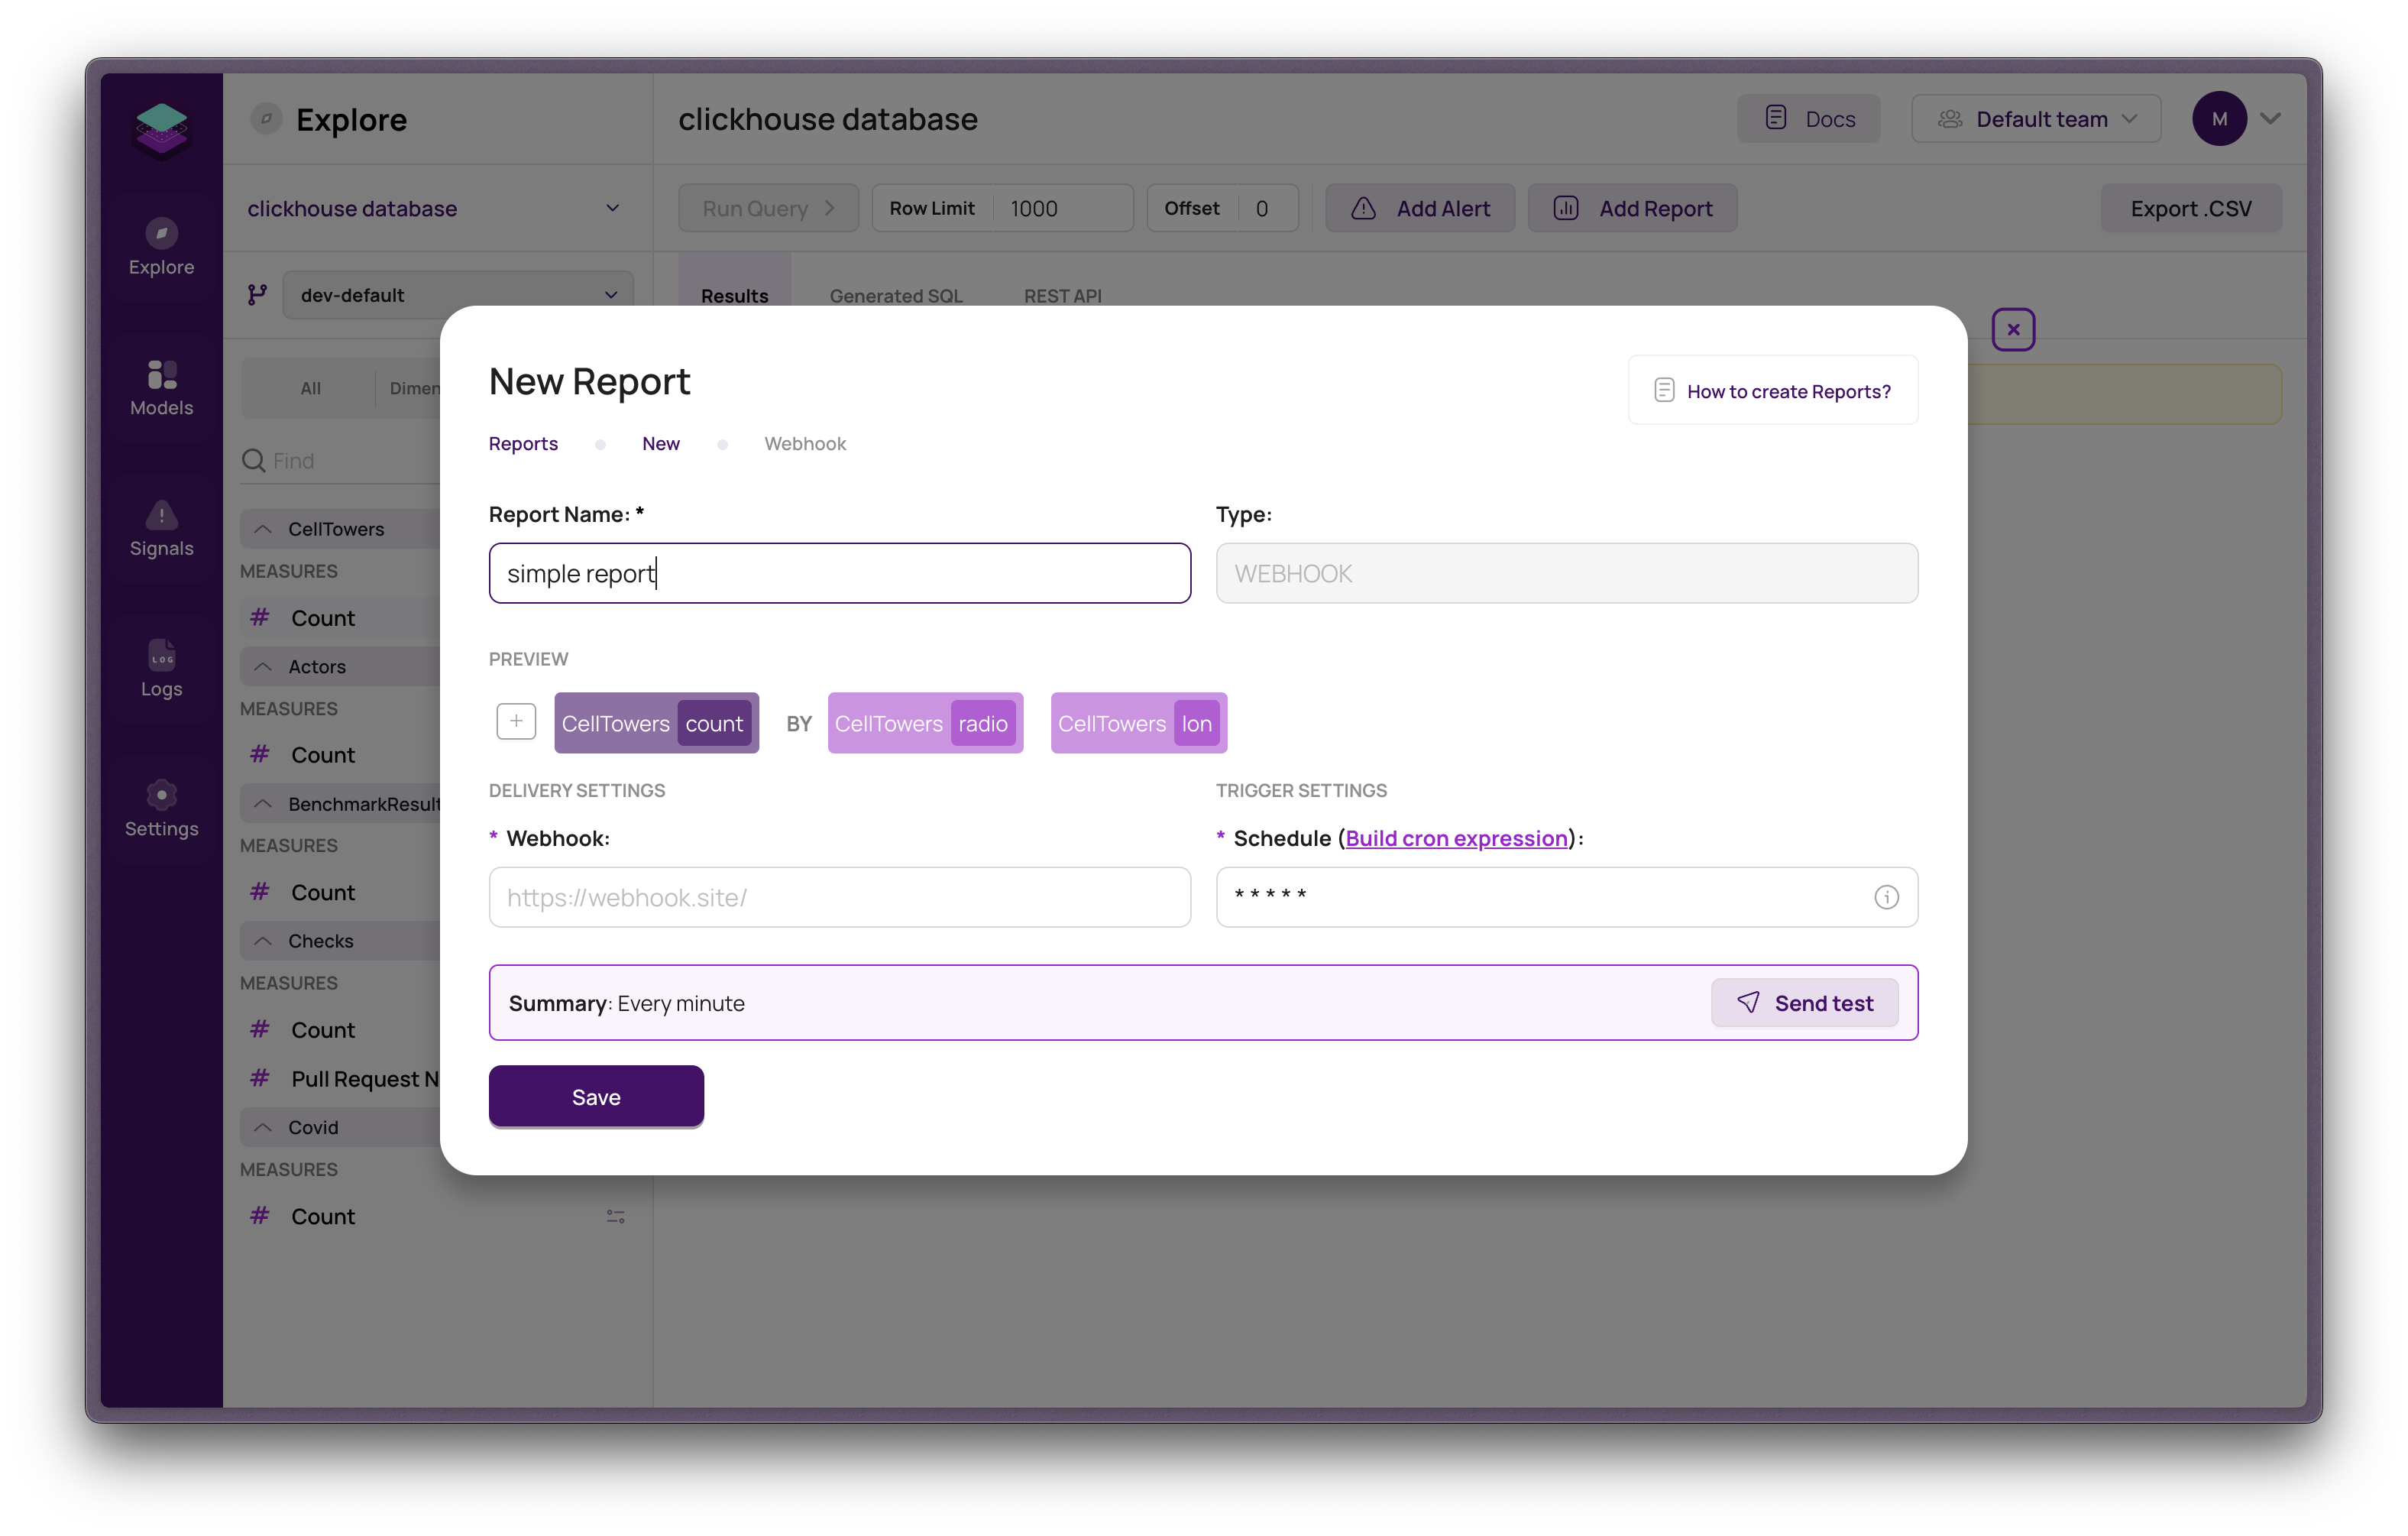
Fill out the report form with the following details:

Form fields description for the Reports page:
Report Name: Enter a name that easily identifies the purpose and content of the report.
Preview:
In the "Preview" section, you will find crucial details for the Alert or Report, including the user-selected metric referred to as the "Query Key." This metric is at the core of your monitoring process and plays a pivotal role in alerting or report generation.
Here, you'll also discover various other essential components such as:
Measures: These represent the quantitative data that you want to track or display. Users can choose specific measures that matter the most to their analysis, and these will be prominently featured in the Preview.
Dimensions: Dimensions help to provide context and categorize your data. They allow you to break down the information based on various attributes, providing a more comprehensive view of your metrics.
In the Preview, all these elements come together to give you a snapshot of the data and insights you're tracking, ensuring that you're monitoring the right information for your analysis, whether it's for an Alert or Report.
Trigger Settings:
- Schedule: Configure the frequency at which the report will be executed by setting a schedule (e.g., daily, weekly, monthly).
Delivery Settings:
The available fields in this section depend on the chosen delivery method for the report. Here are some common options:
- Webhook: Enter the URL of the webhook endpoint where the report will be sent.
- Slack: Provide the Slack channel or user ID to which the report will be delivered.
- Email: Enter the email address(es) of the recipient(s) who will receive the report.
Once you have completed the settings, click the "Save" button.