Models Page
The Models page is a powerful tool for generating and managing models in your project. It allows you to define the structure and relationships of your data, ensuring consistency and integrity. Models are generated using Cube.js, a powerful open-source analytical API platform. You can refer to the Data Models for more details. Additionally, the page provides features for version controlling your schemas and executing SQL queries on the associated data sources. Here's how you can make the most of this page:
How to Get Started
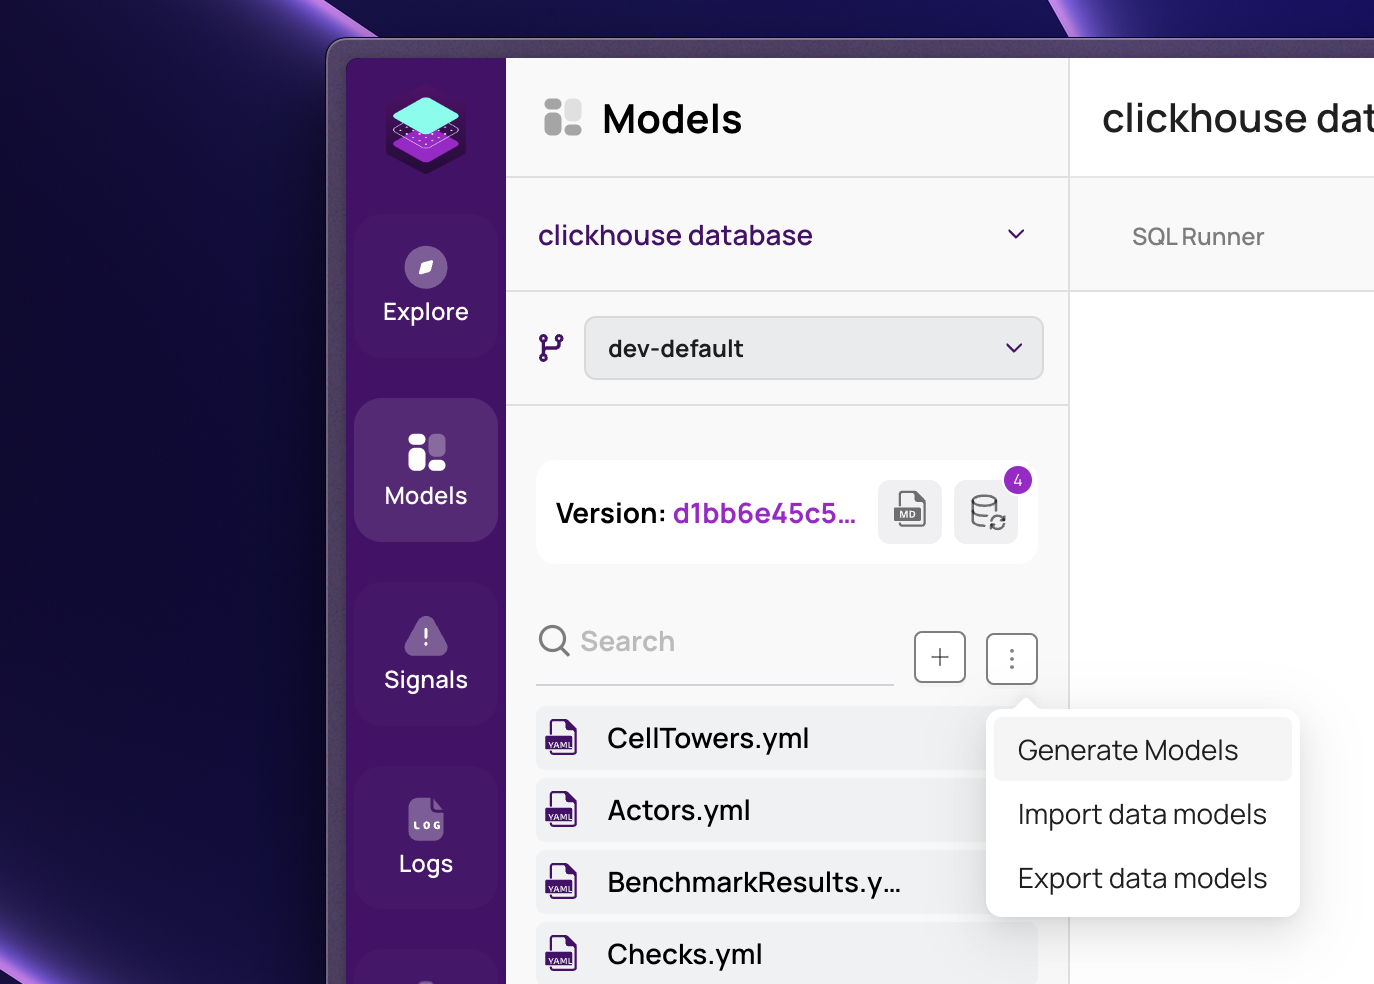
To get started, you need to generate data models. Select the "Generate Model" option from the menu (shown in the screenshot below).
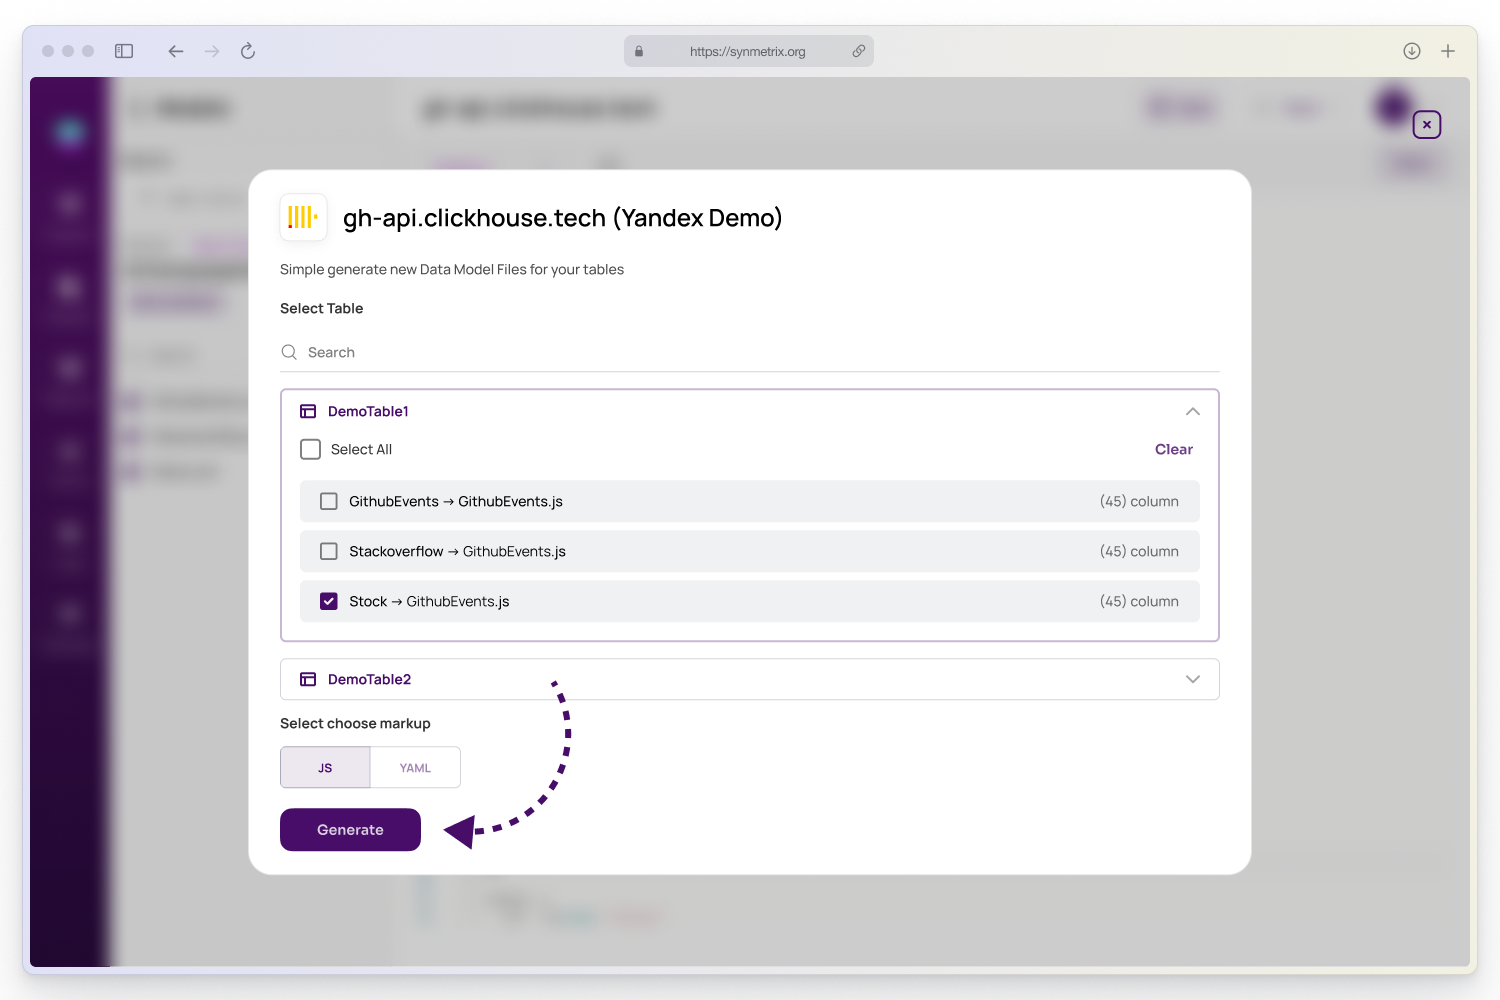
In the opened window, navigate to the required sections by opening the corresponding tabs and check the boxes next to the tables or metrics you want to analyze. Then, click the "Generate" button (indicated by the arrow in the screenshot below).
Now you should see the generated data model files in the right column (as shown in the screenshot below). You can freely edit your models as needed, adding and removing measures and dimensions. All your changes will be tracked by the version control system, the details of which are described below.
Version Control System
The version control system tracks changes to the data models, allowing you to revert to previous states of the models.
To view the saved versions, open the drop-down menu located at the top left of the page and select the "Show versions" option (as shown in the screenshot below).
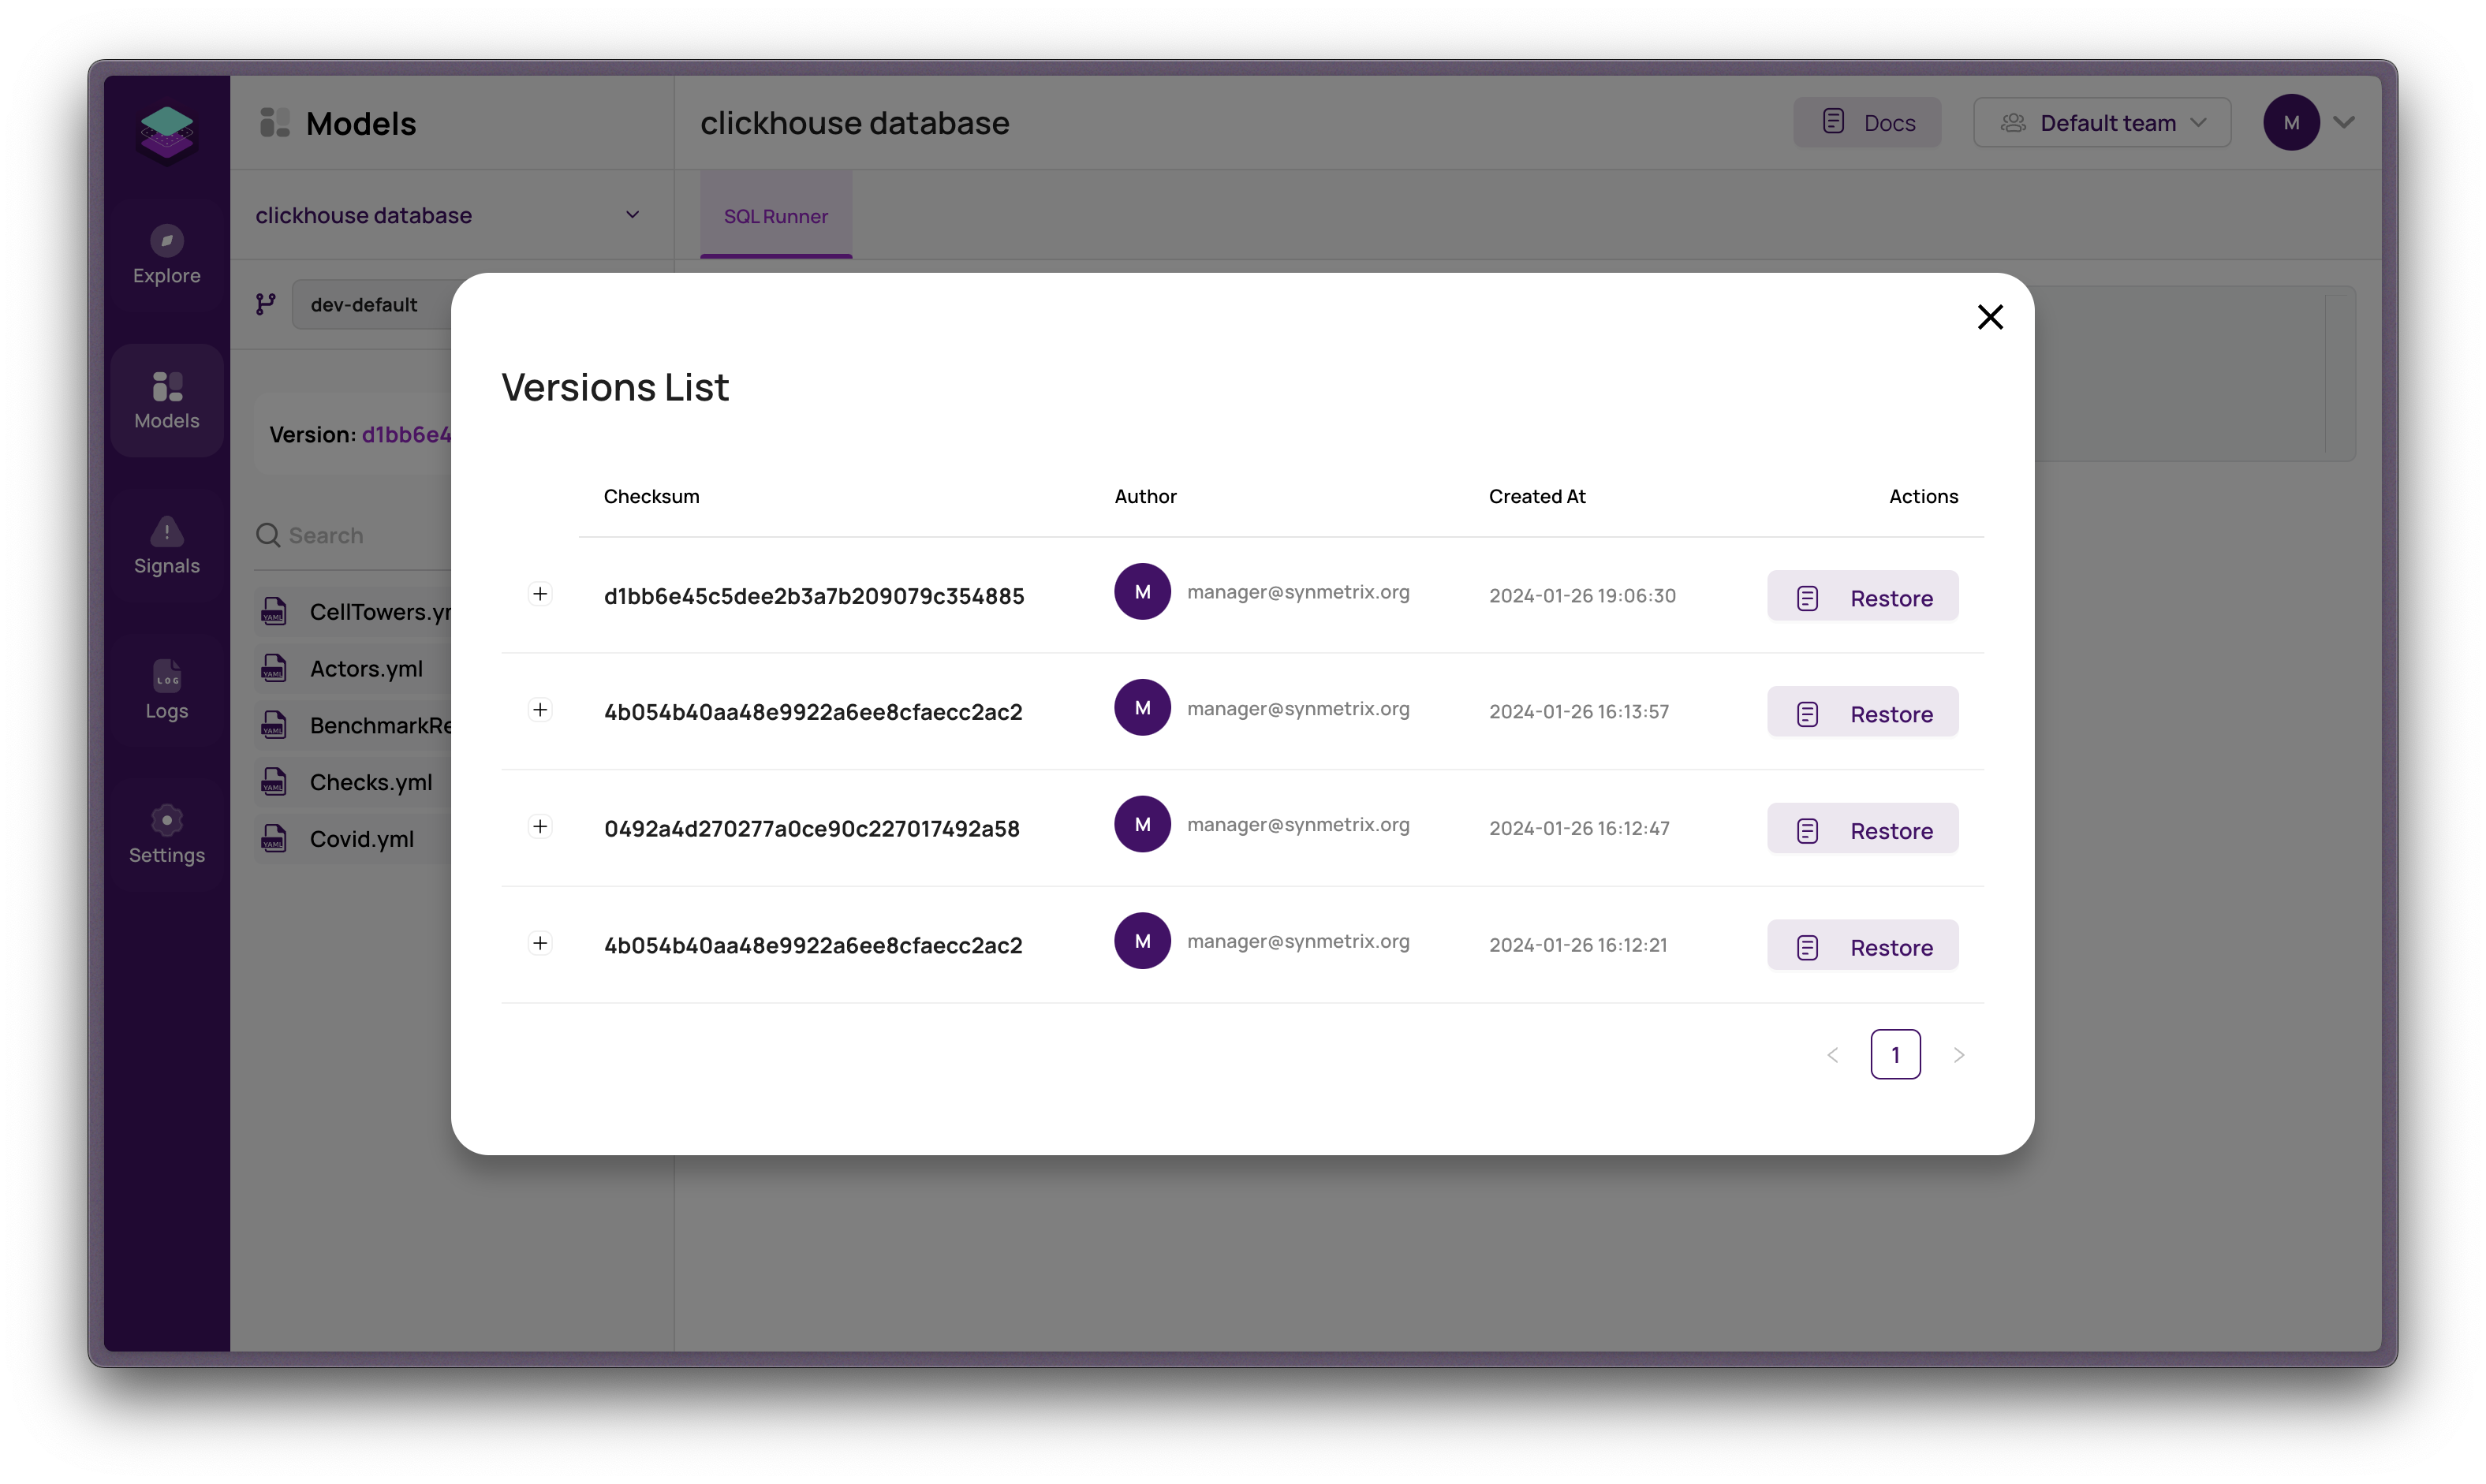
In the opened window, you will see all the saved versions of the data models (as shown in the screenshot below). By expanding the rows, you can view the files and their contents. To revert to a specific version, simply click the "Restore" button next to it, and it will become the current version.
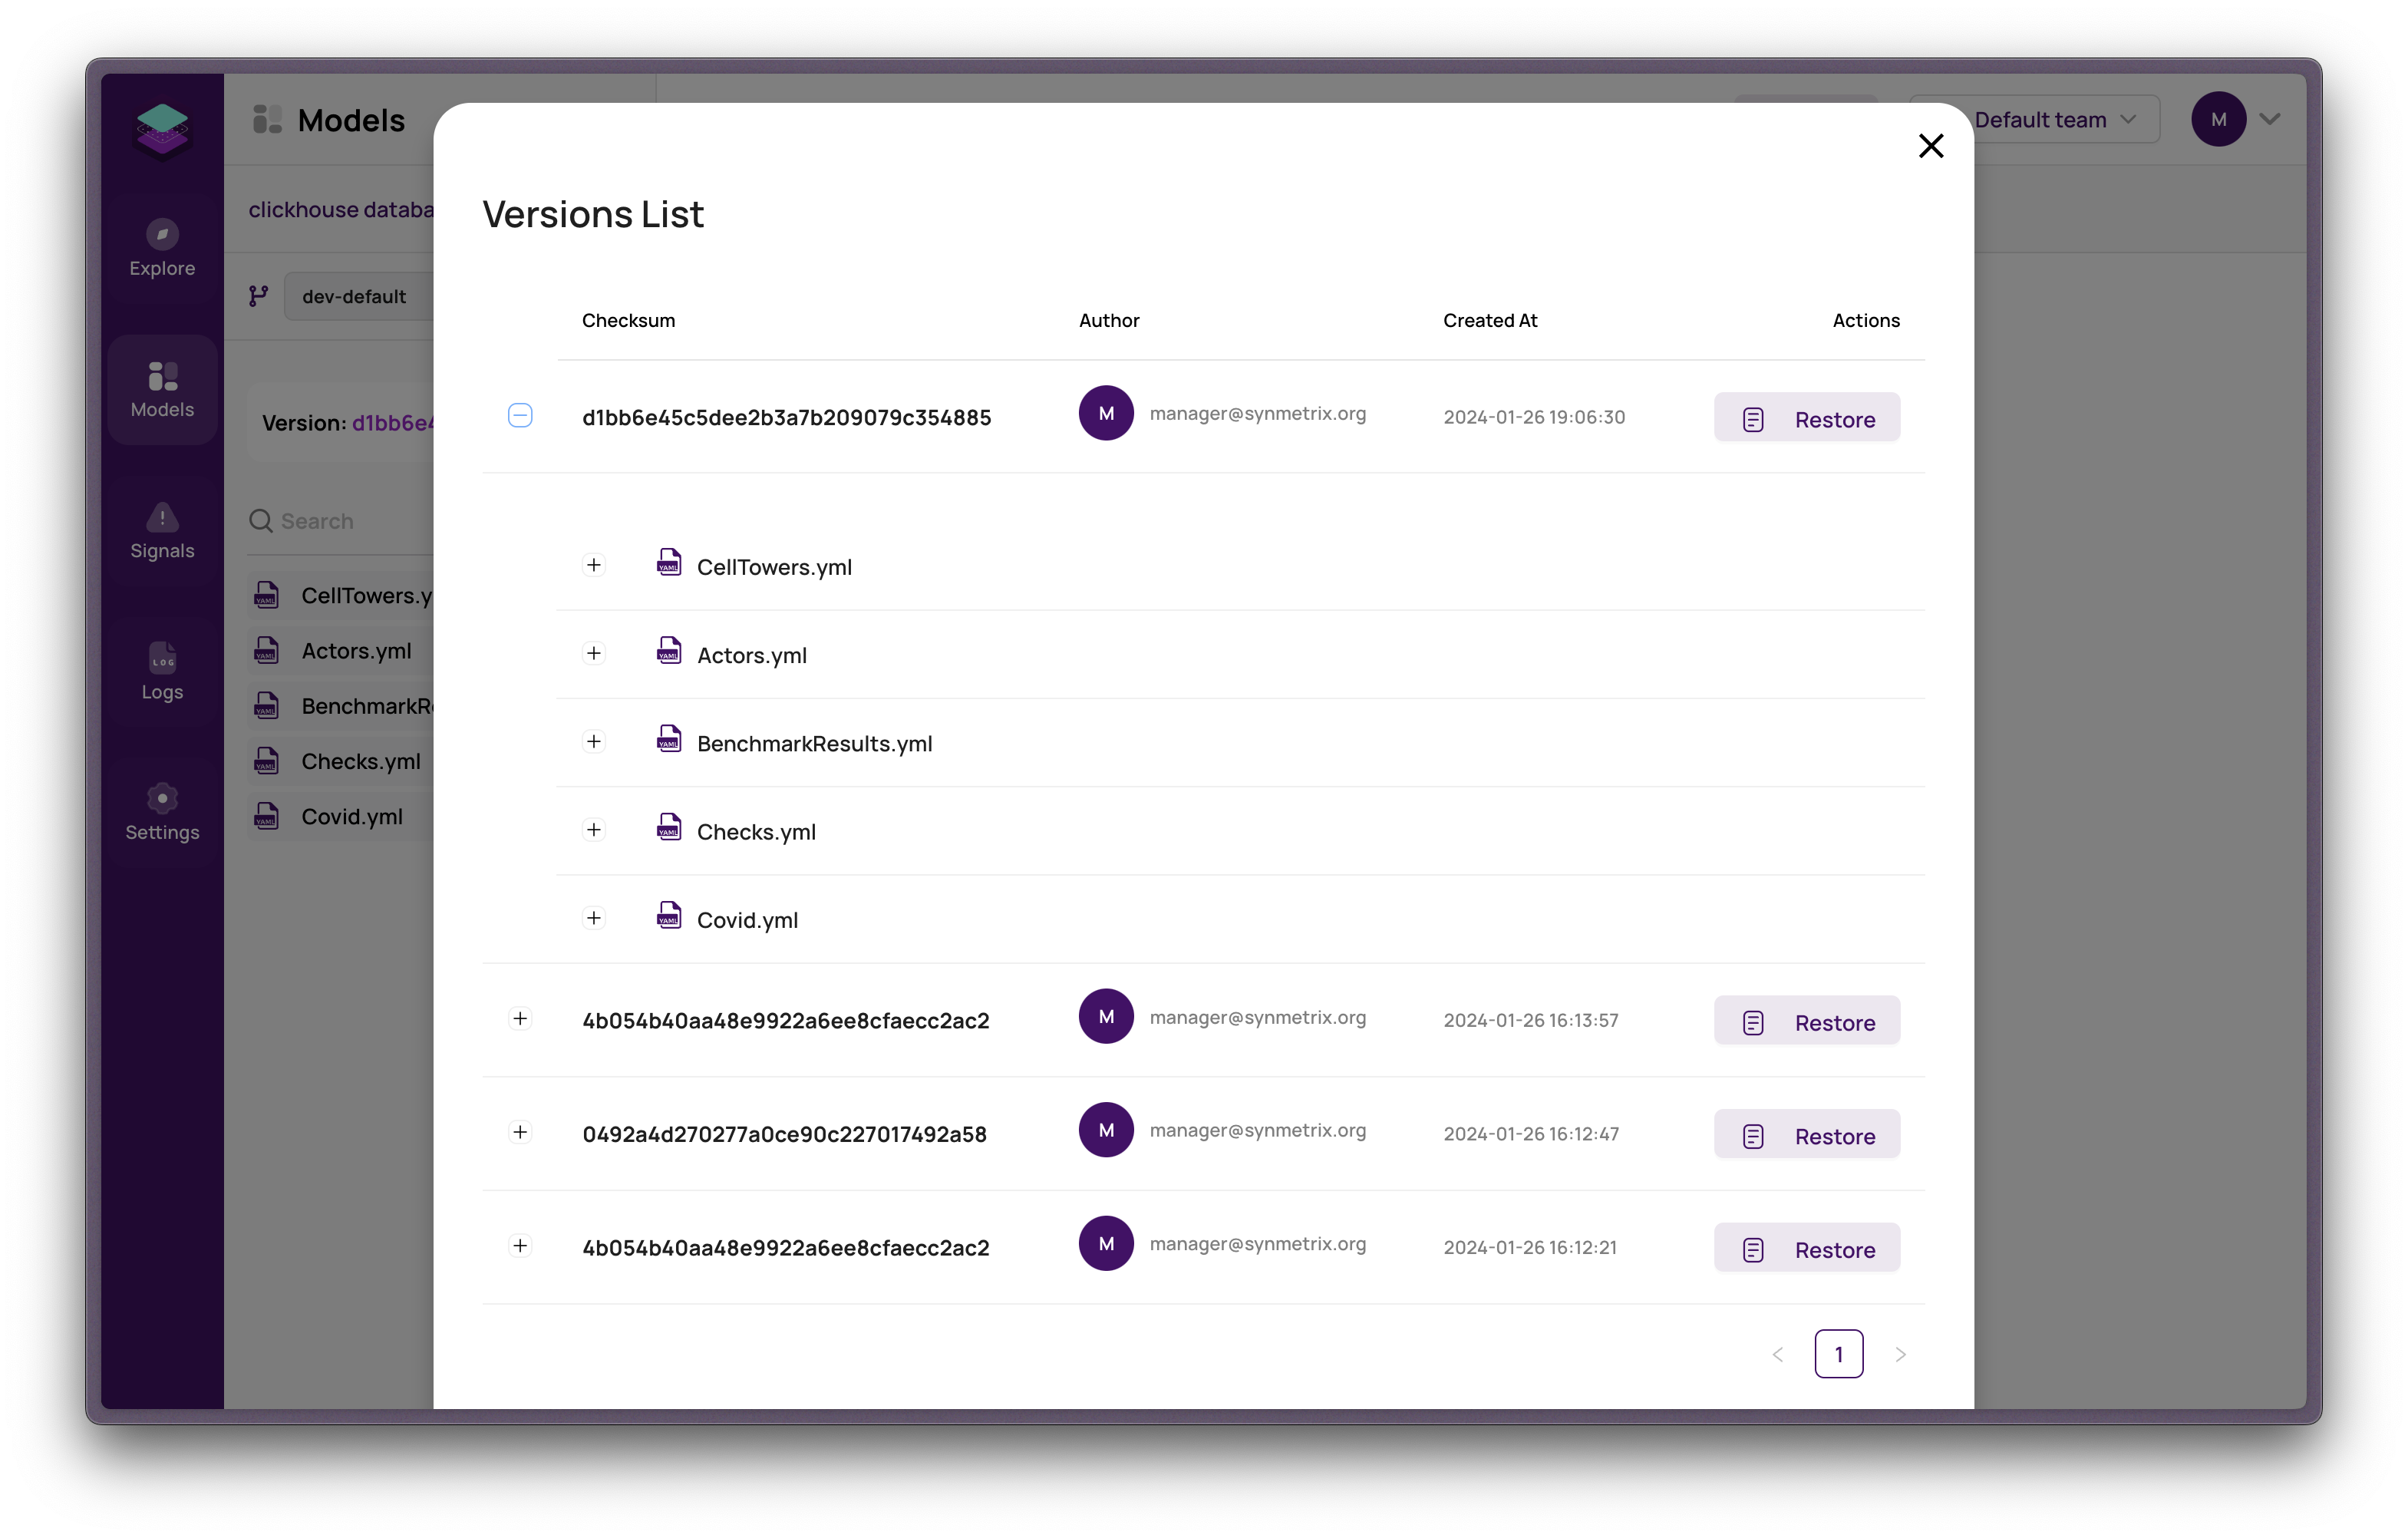
Additionally, the version control system allows you to create separate branches of versions, which can help you switch between versions more efficiently than restoring versions within a single branch.
To create a branch, open the branch list located in the top left corner of the page, enter the name of the new branch in the field, and click the plus icon button.
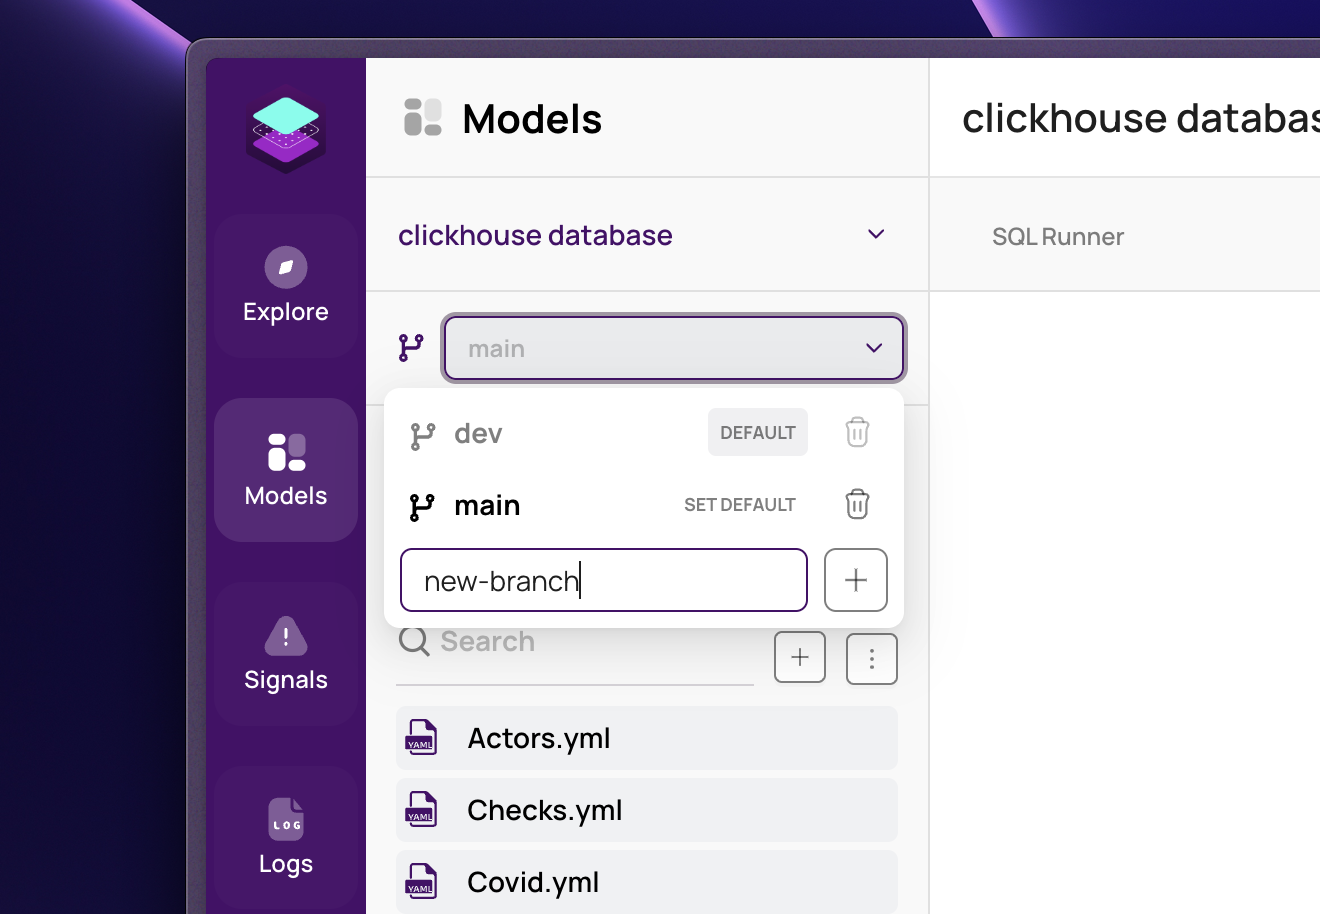
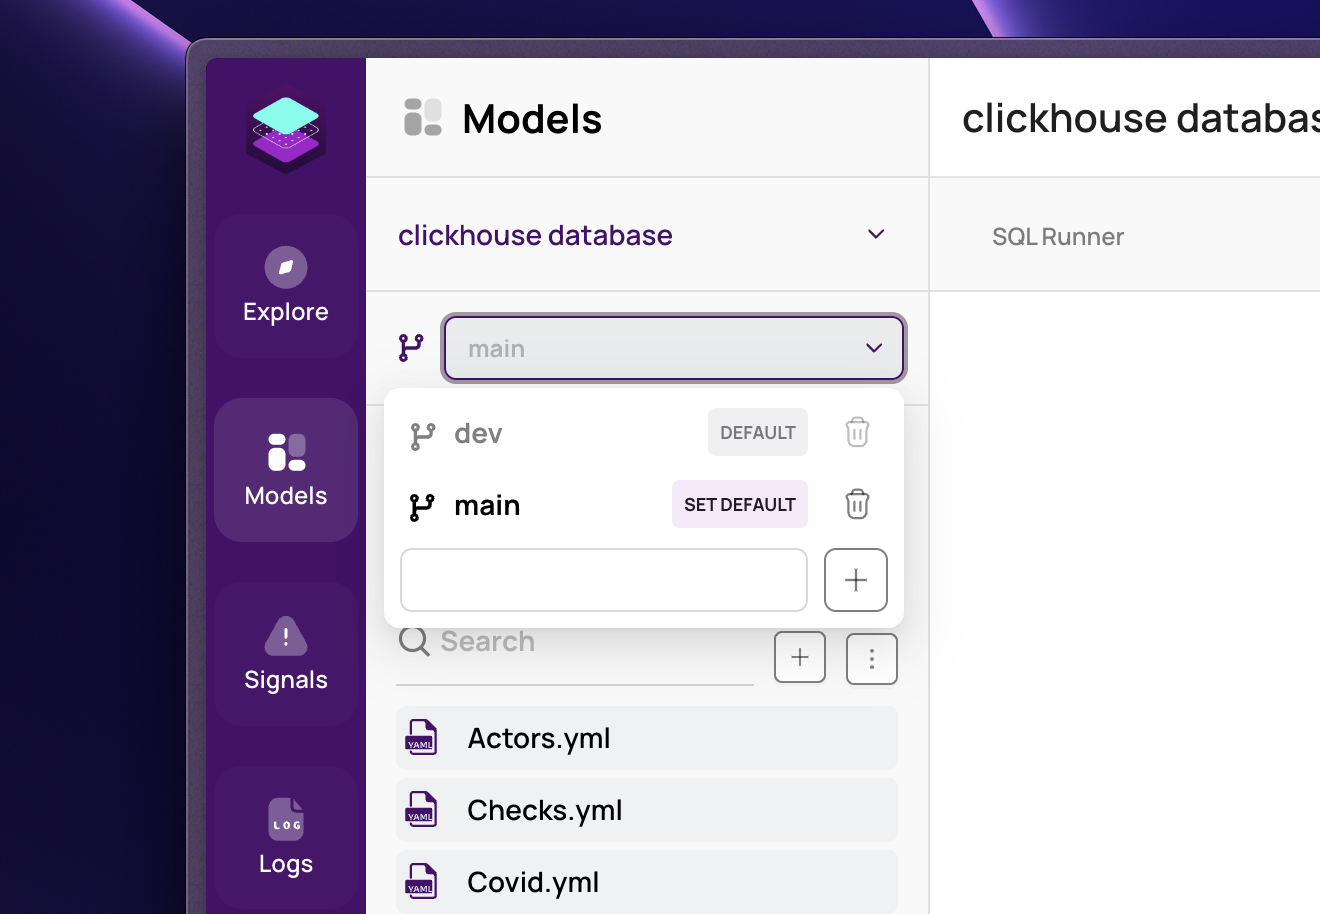
This will create a new branch with the current state. To work with the new branch, you need to switch to it and then make it the default branch by clicking the "Set as default" button (shown in the screenshot).
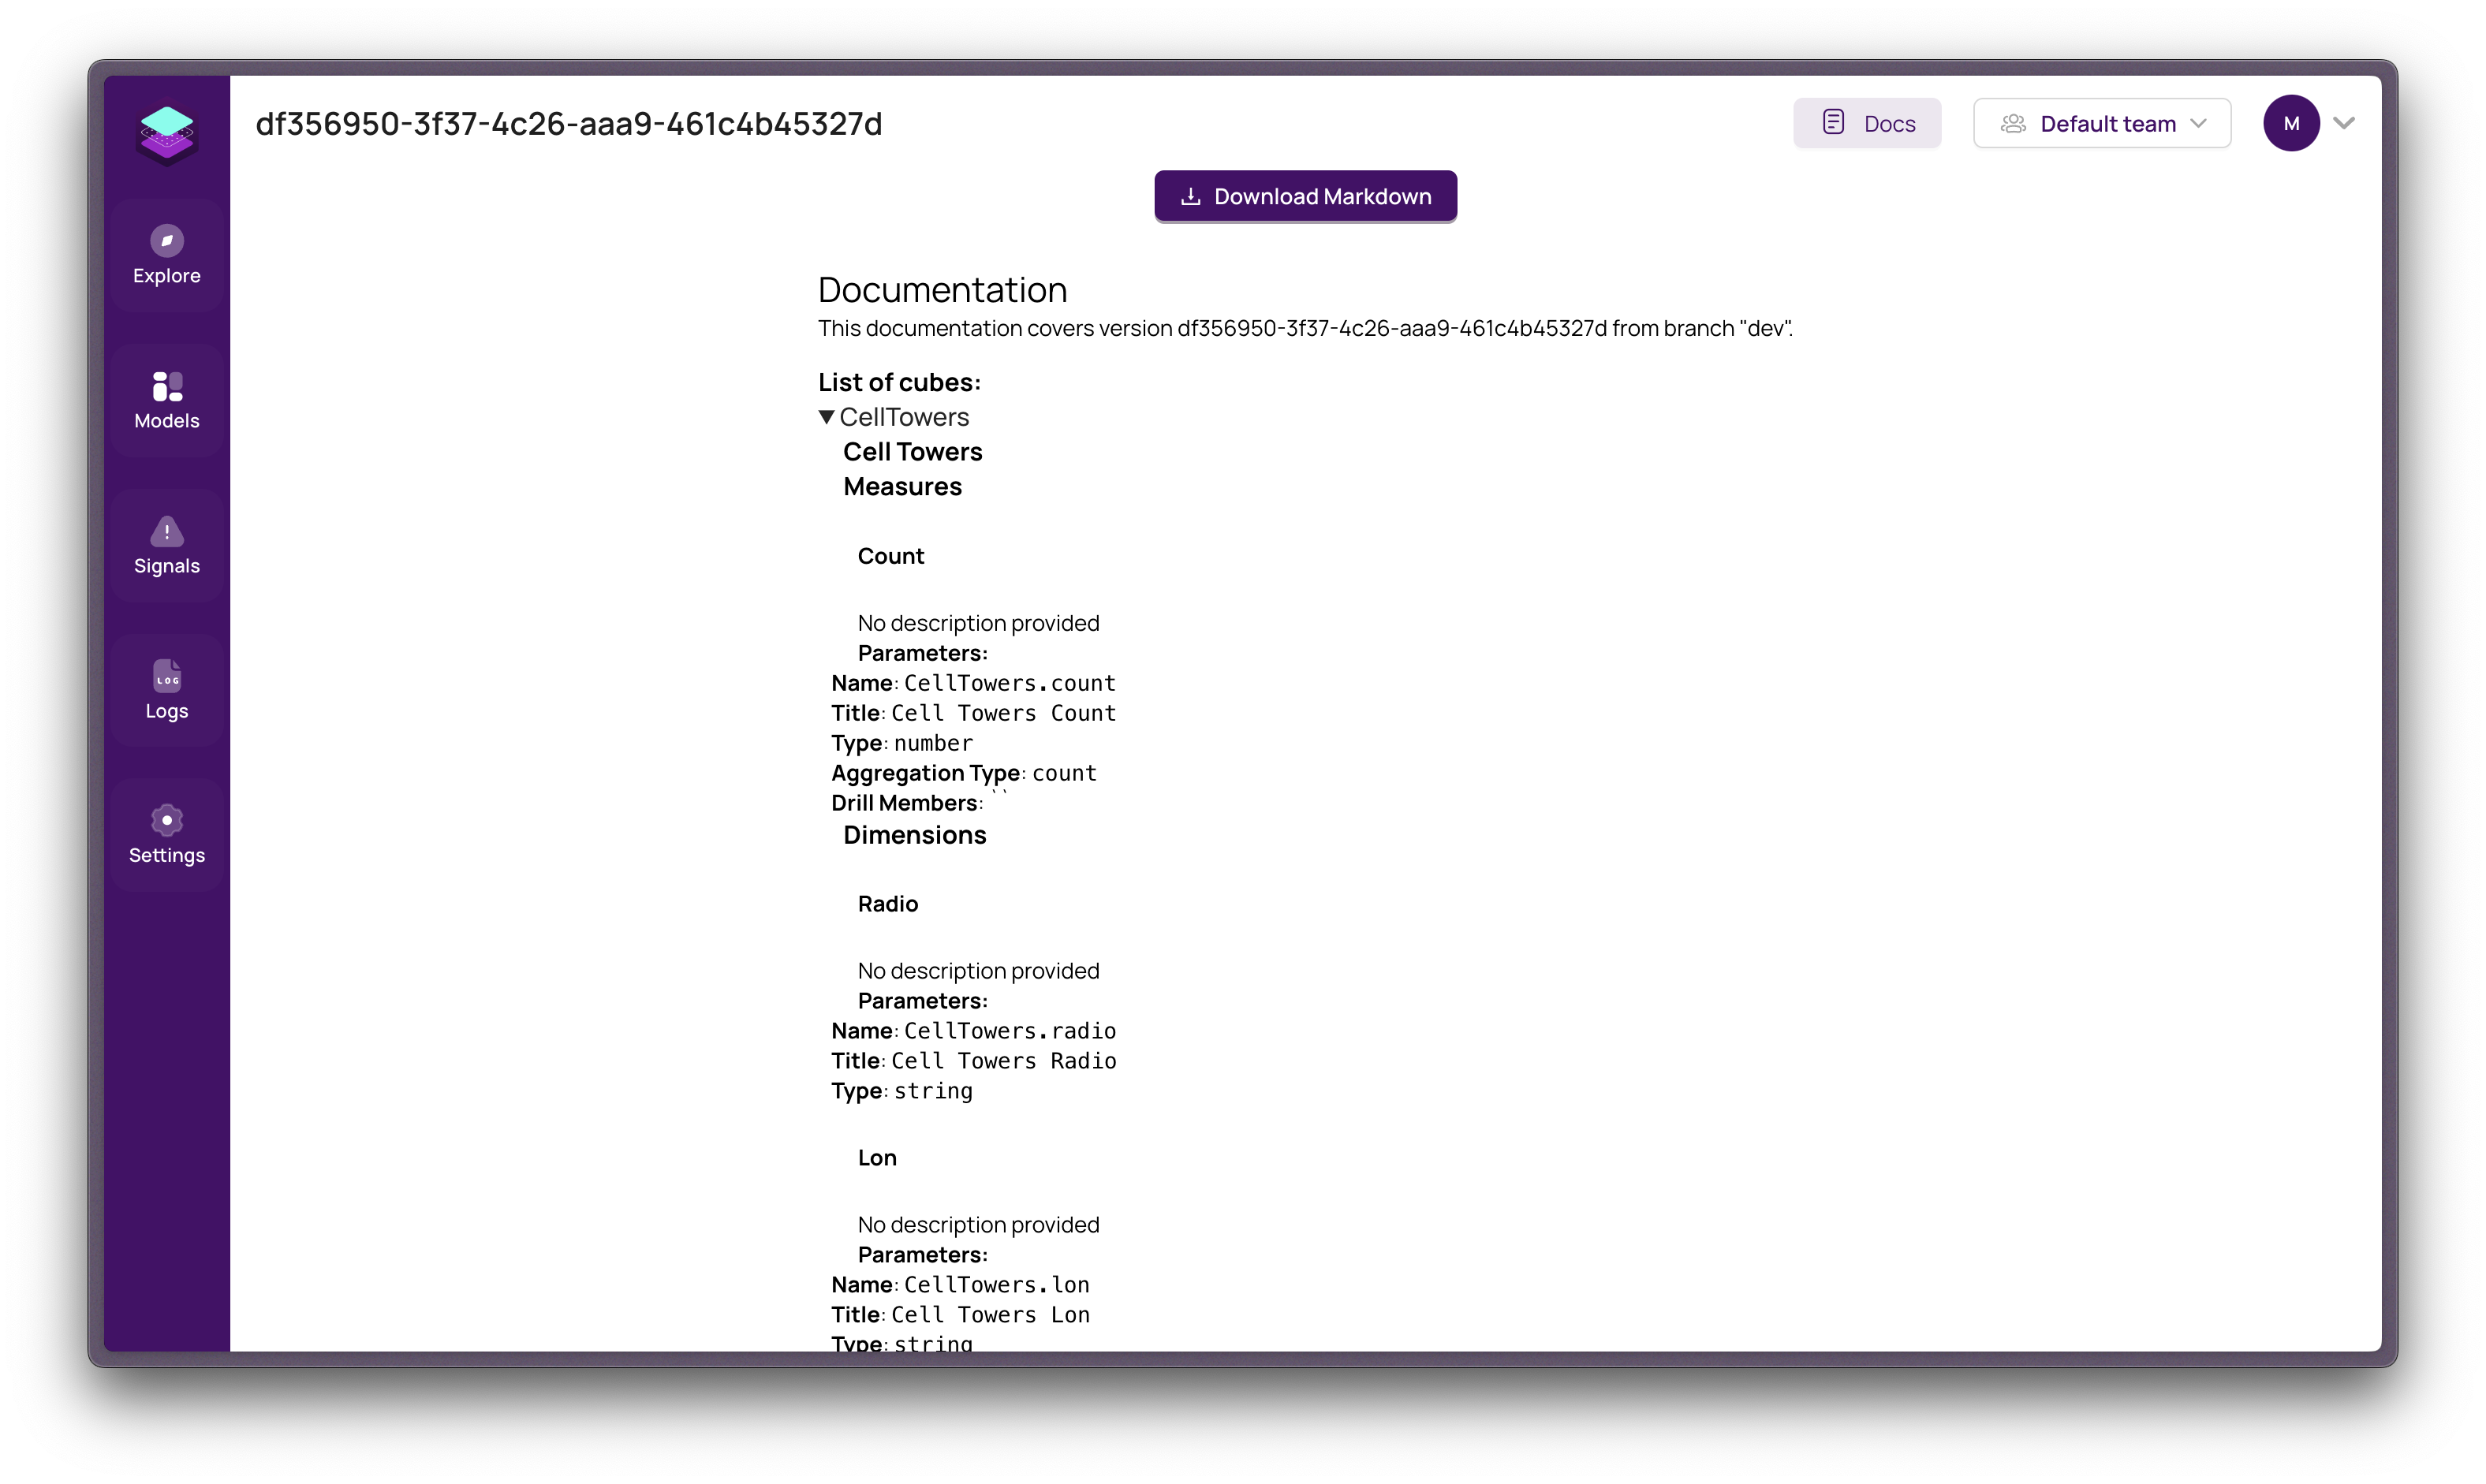
Viewing Version Docs
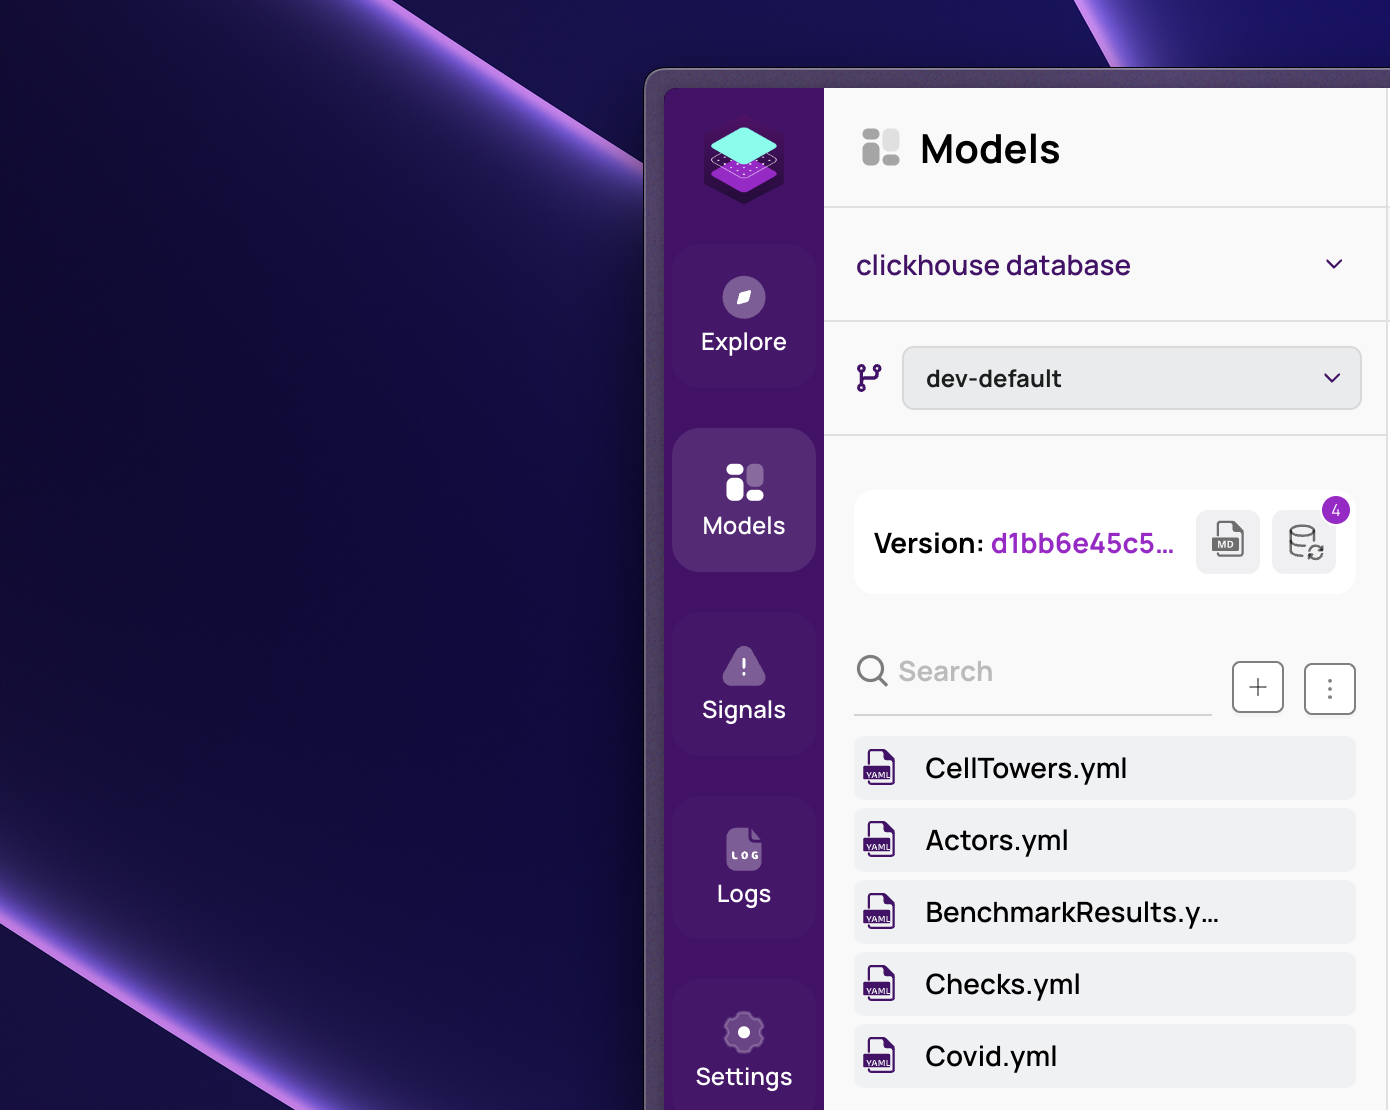
- Go to Sidebar: Click on the sidebar in Synmetrix.
- Click 'Docs': Find and click the 'Docs' button.
- Get the Docs: The file with the version's documentation will be generated for you.
SQL Runner in Models
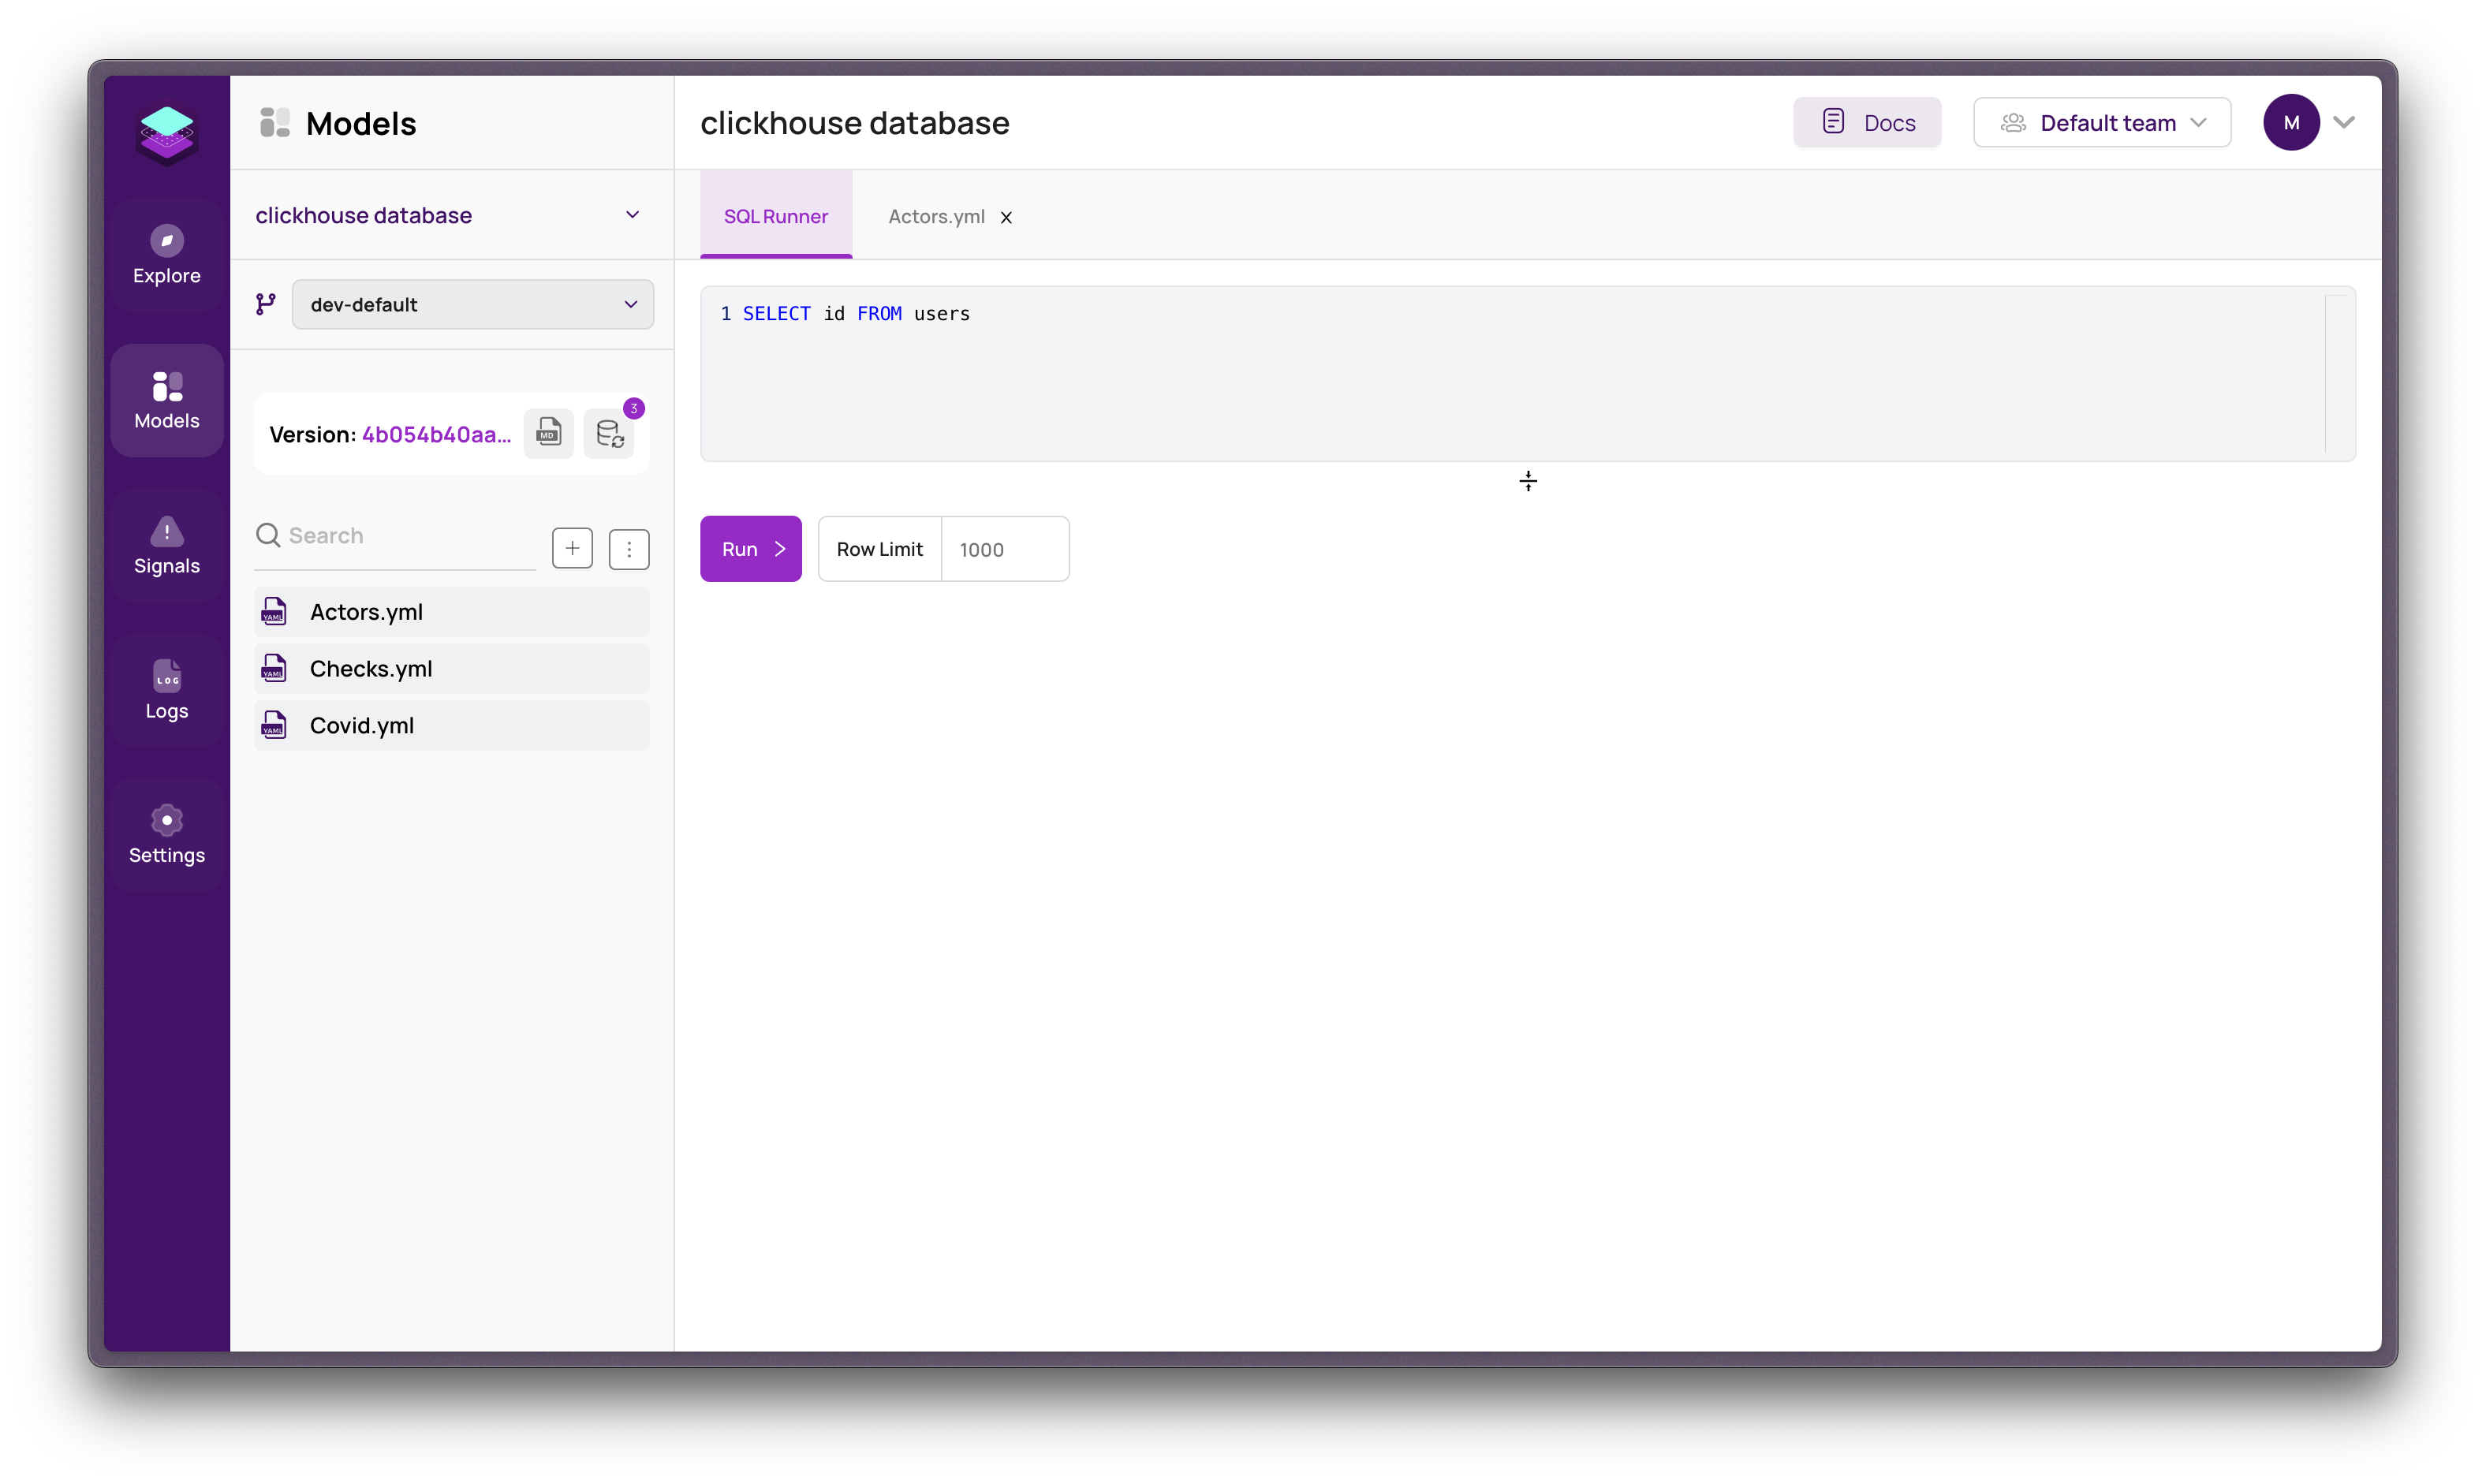
Accessing the SQL Runner in Synmetrix
Opening the SQL Runner in Synmetrix for running custom SQL queries is a straightforward process. Here's how to do it:
Navigate to Model Page: First, go to the model page in the Synmetrix interface. This is where all your data models are listed.
Open SQL Runner Tab: Look for a tab or section labeled "SQL Runner" and click on it. This action will open the SQL Runner interface.
Compose Your SQL Query: In the provided space, you can write your SQL query. For example, you might write a query to select data from a specific table or to perform a more complex data manipulation.
SELECT * FROM your_table_name WHERE condition;Execute the Query: Once you've written your query, click the "Run" button. This will execute the SQL query against your data models.
View Results: After running the query, the results will be displayed in a table format directly in the SQL Runner. This allows you to review and analyze the data returned by your query.
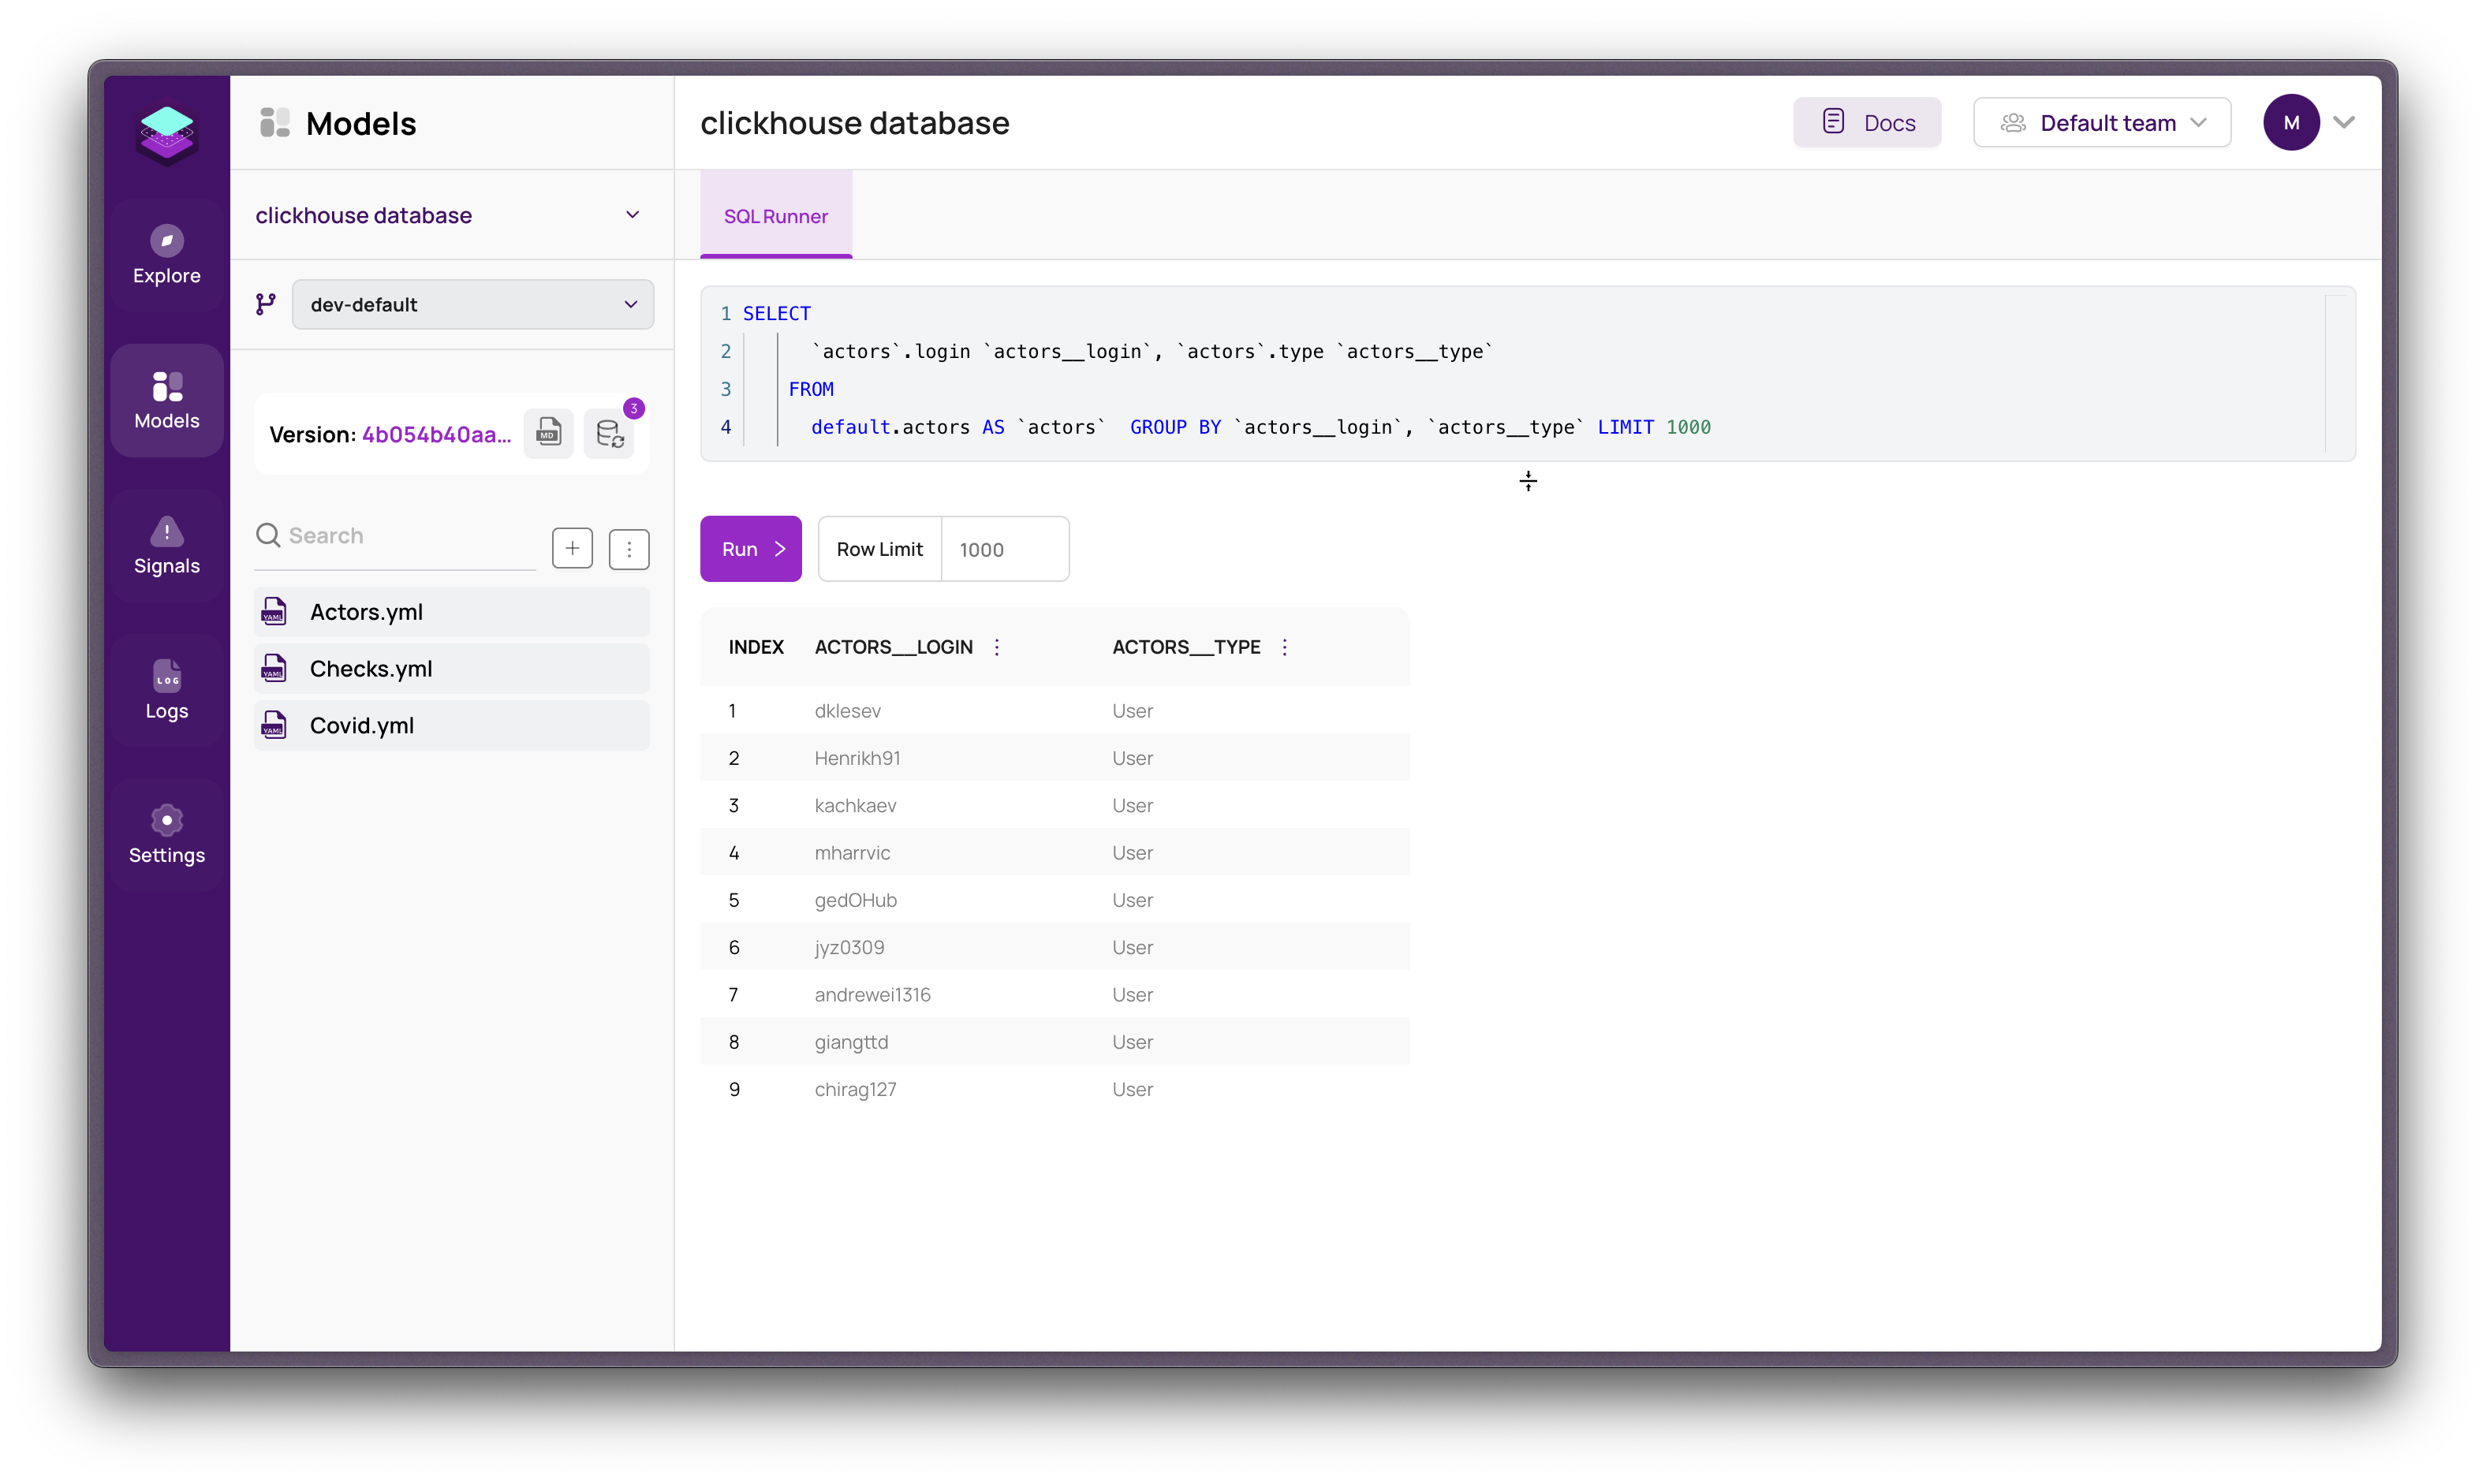
The Model SQL Runner in Synmetrix is a feature that allows you to run SQL queries directly against your data models. This tool is particularly useful for users who need to perform complex data analysis or want to test and validate their model configurations. Here’s a brief overview:
Functionality: The SQL Runner enables you to write and execute SQL queries on the fly. It interacts directly with the data models you've set up in Synmetrix, allowing for real-time data retrieval and analysis.
Use Cases:
- Data Exploration: Quickly run queries to explore data patterns or validate data integrity.
- Testing Models: Test how new or modified data models perform with actual SQL queries.
- Advanced Analysis: Perform complex data analysis that might not be possible through standard model exploration.
Real-Time Results: Queries executed in the SQL Runner provide immediate feedback, enabling you to rapidly iterate and refine your analysis.
Editing Models in Synmetrix
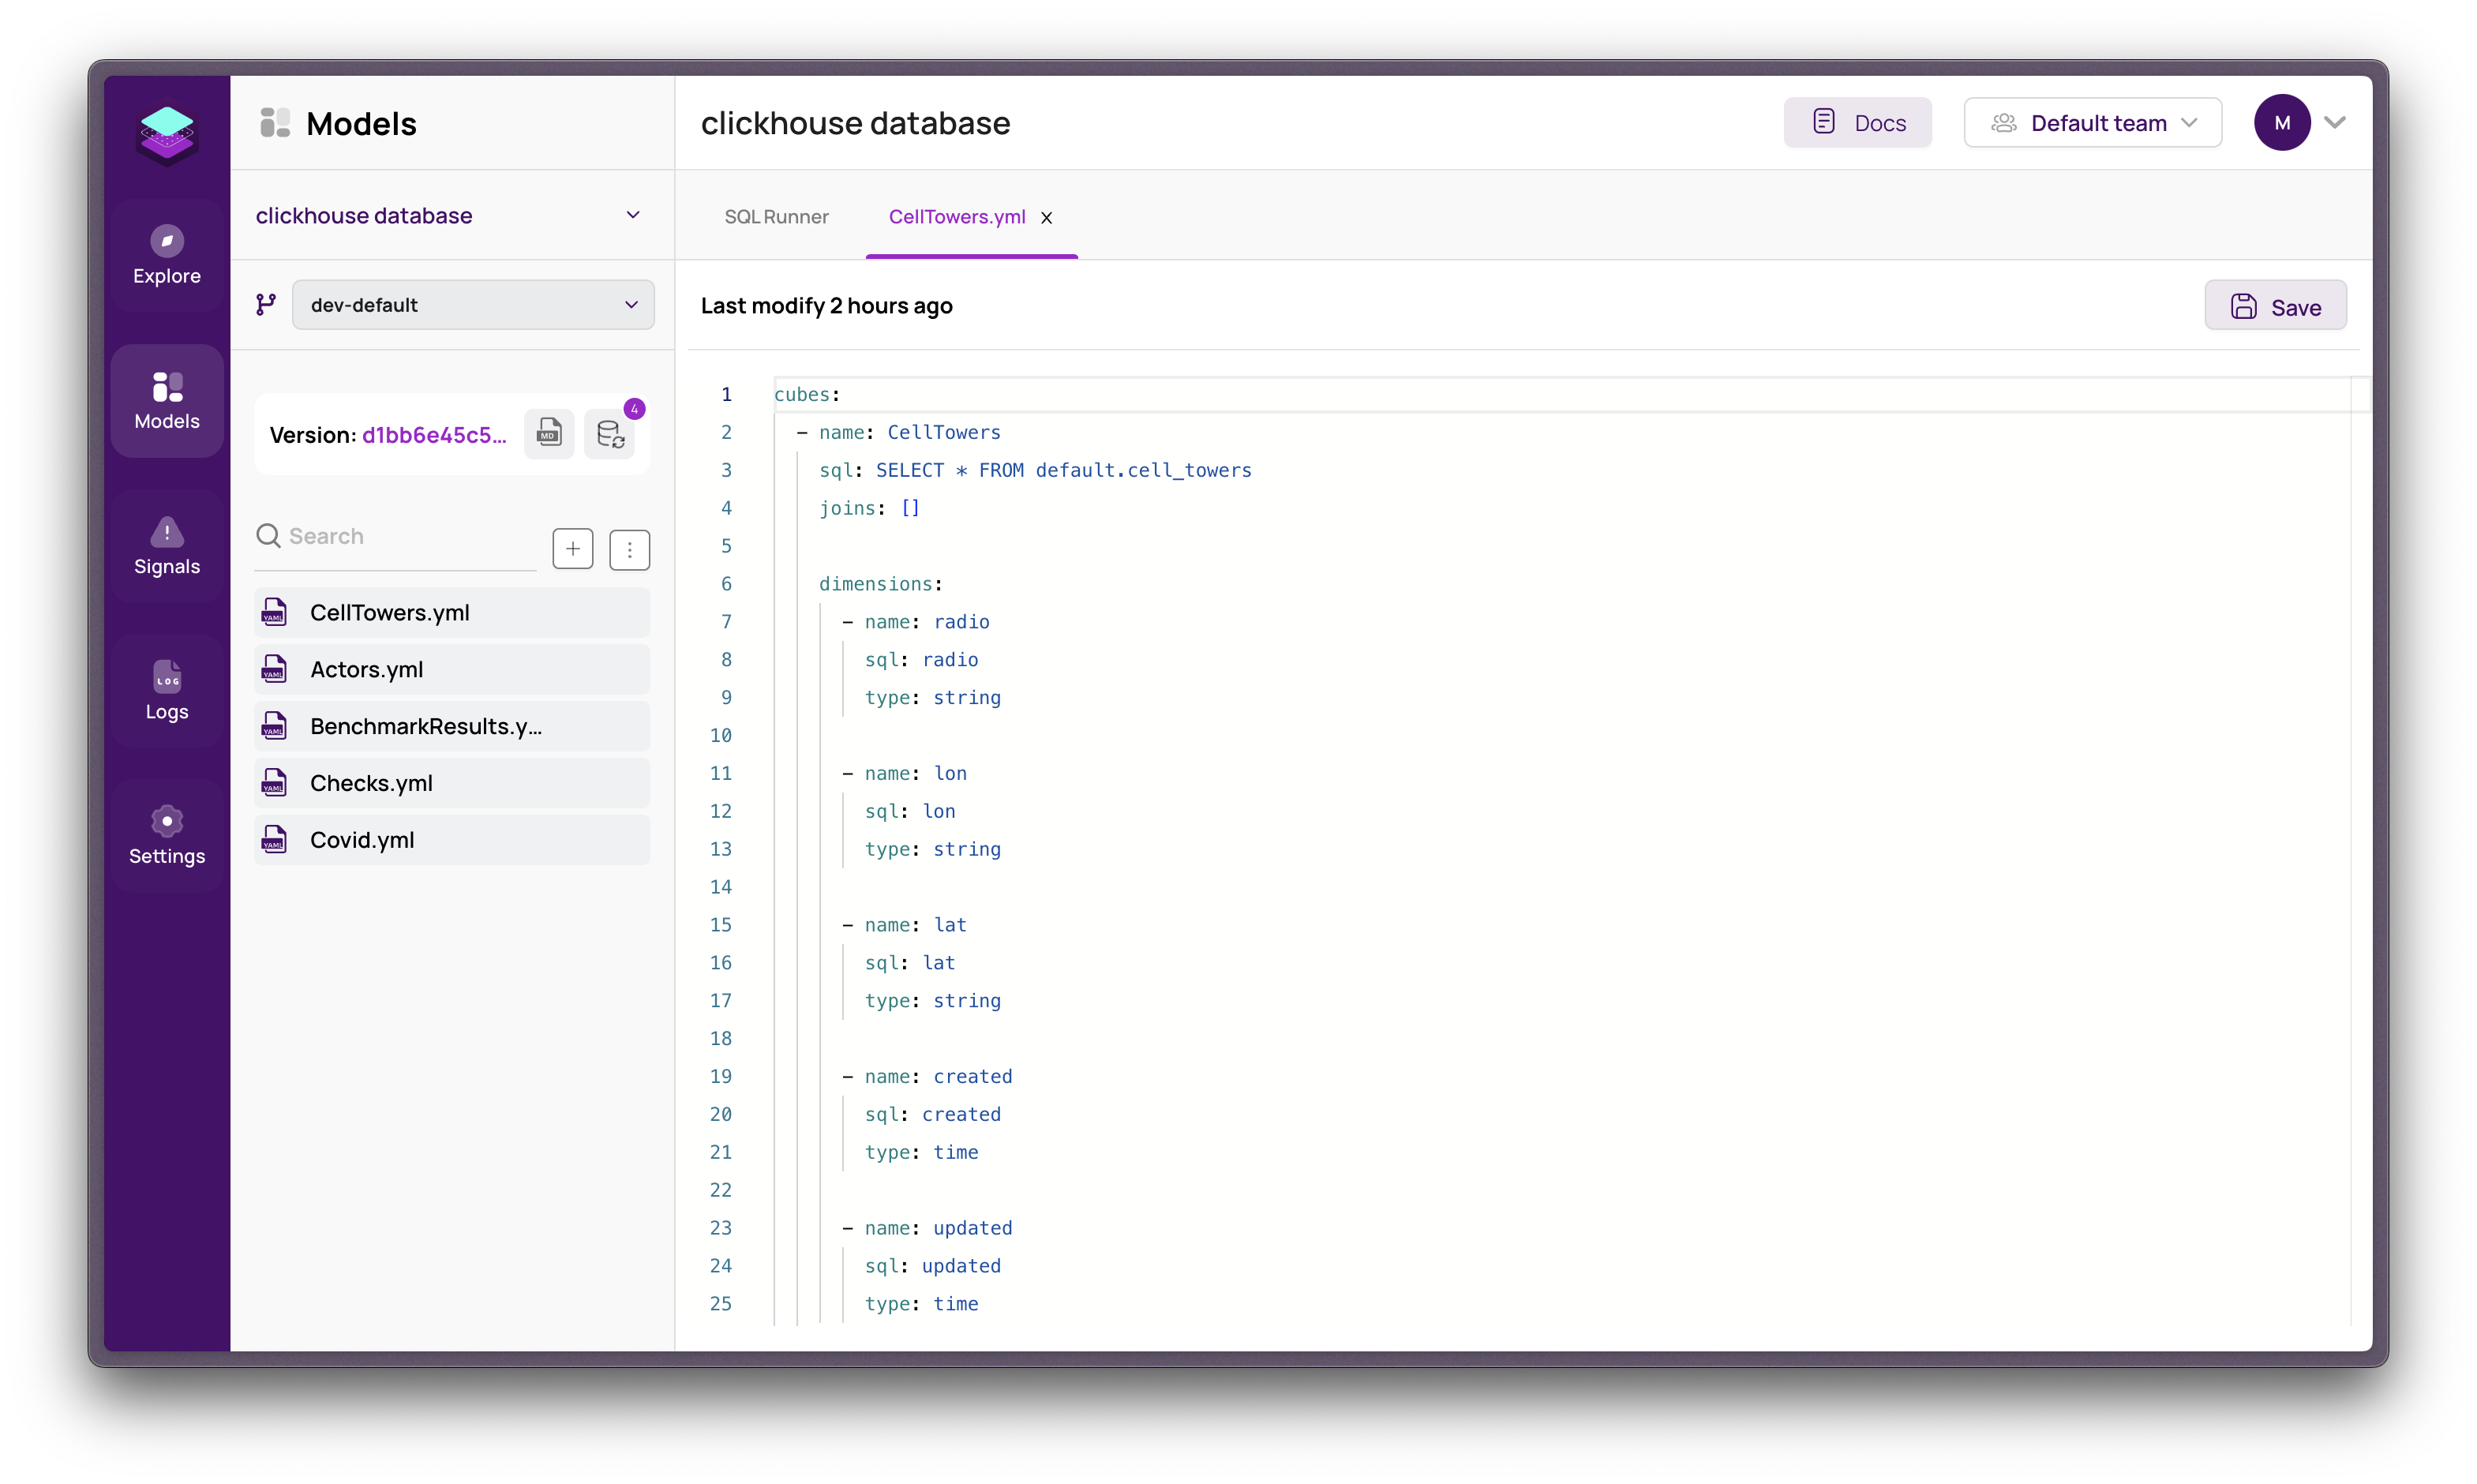
- Open a Model: In sidebar, select and open the model file you wish to edit.
- Begin Editing: Utilize the Visual Model Editor to make changes to the model. You can adjust various aspects such as dimensions, measures, and relationships.
- Save Changes or close tab: After completing your edits, ensure to save the model to apply the modifications.
The Visual Model Editor in Synmetrix, enhanced with YAML support, offers an intuitive and user-friendly way to manage data models. YAML's readable format simplifies the process of defining and configuring models, making it accessible even to those with limited coding experience. This combination of a graphical interface and YAML/JS editing provides a flexible and efficient model editing experience, catering to both beginner and advanced users in data model management.
Importing or Exporting Data Models
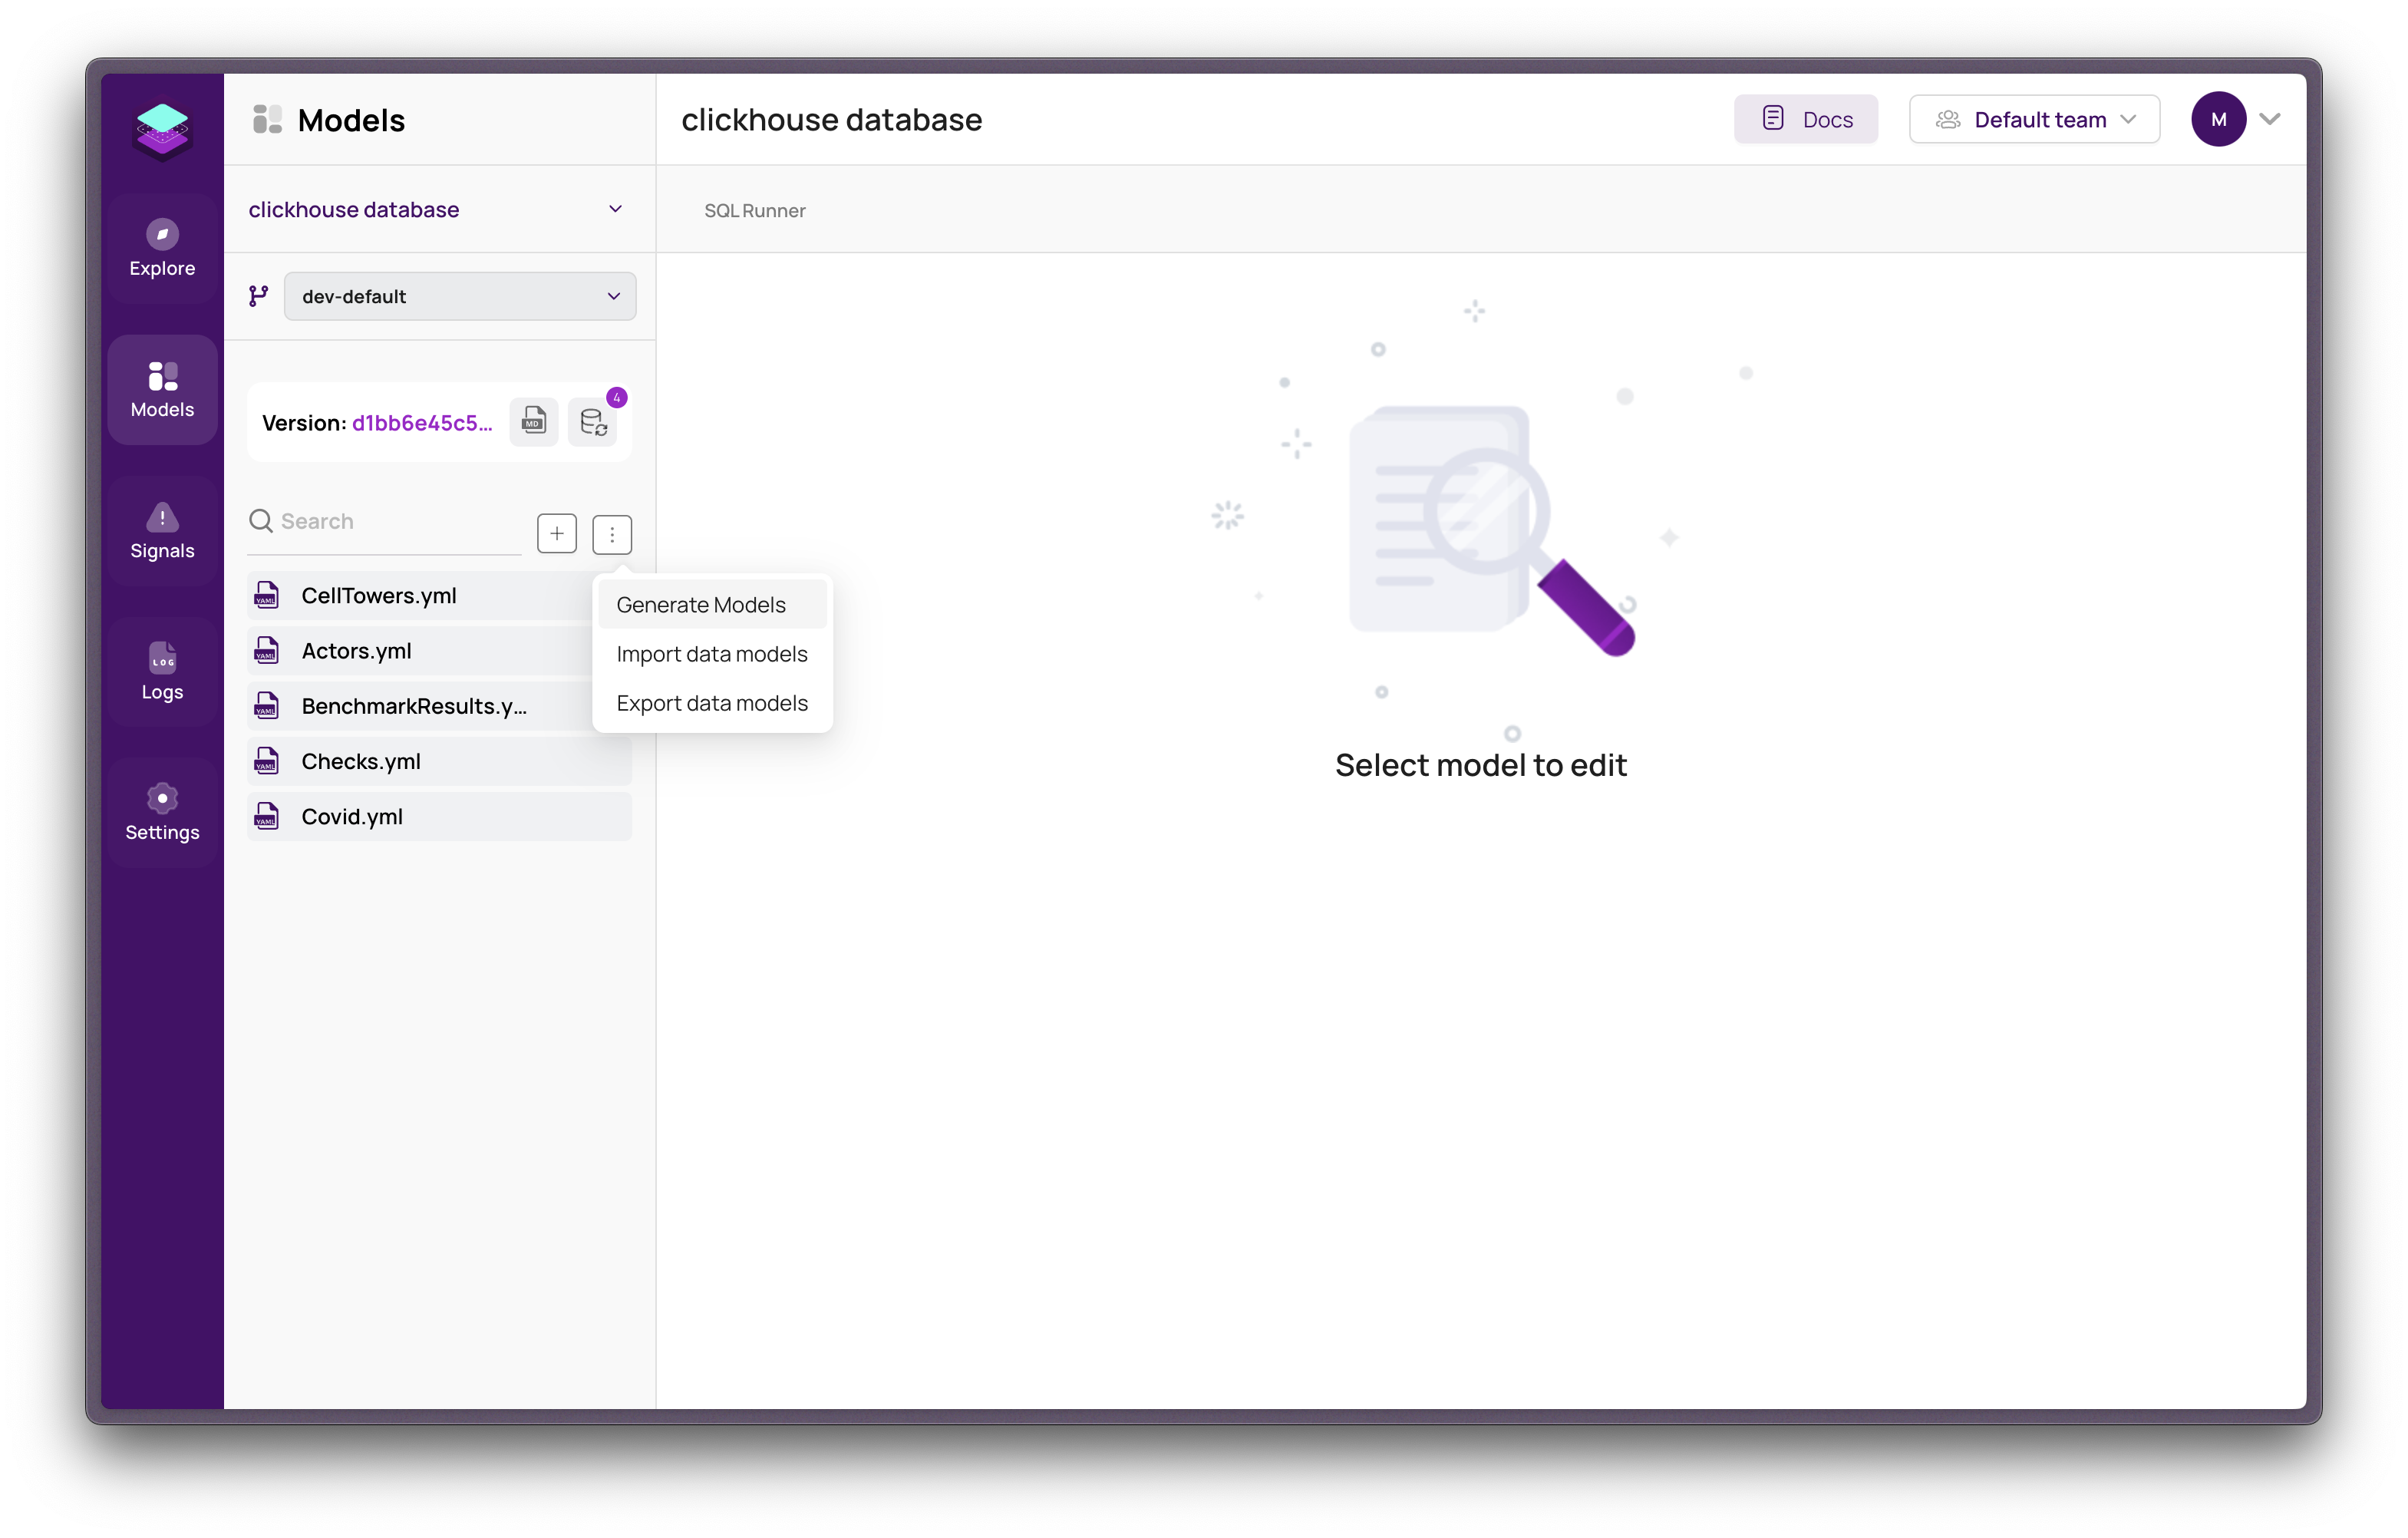
- You can upload data model files from your computer to Synmetrix.
- Easily save and download your data model files from Synmetrix.
Using the Visual Model Editor
- Edit and tweak your data models right in Synmetrix with a user-friendly editor.
Deleting a Model

- Open Sidebar: Start in the sidebar.
- Find Your Model: Look for the model you want to delete and hover over it.
- Click the Trash Icon: Hit the trash can icon next to the model.
- Confirm Delete: Click "Remove" to confirm.
- Done: The model is now deleted.
Changing Model Name and File Format
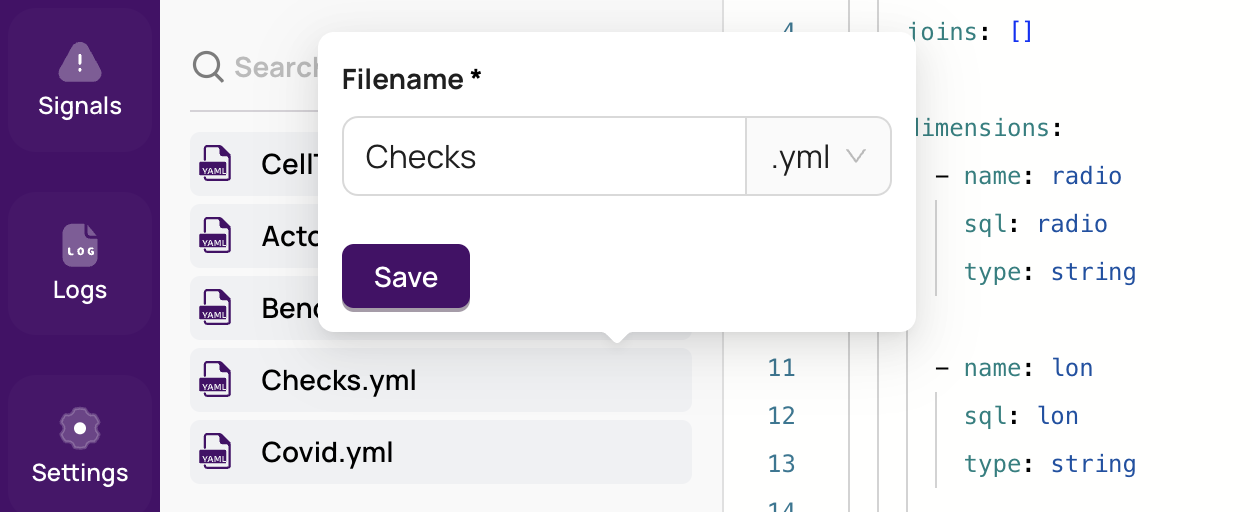
- Head to Sidebar: Go to the sidebar in Synmetrix.
- Choose a Model: Hover over the model you want to change.
- Edit: Click the pen icon.
- Make Changes: Change the name and file format (JS or YAML).
- Finished: Your changes are saved.
These steps are a simple way to handle your data models in Synmetrix, whether you're adding, editing, or removing them.
Related Articles
- Data Models: Learn more about data models and how they're used in Synmetrix.