Alerts Page
The Alerts page is a powerful feature that enables you to configure notifications based on specific conditions within your data. When these conditions are met, an alert is triggered, keeping you informed in real-time through your chosen notification method. Here's how to set up an alert from the Explore page:
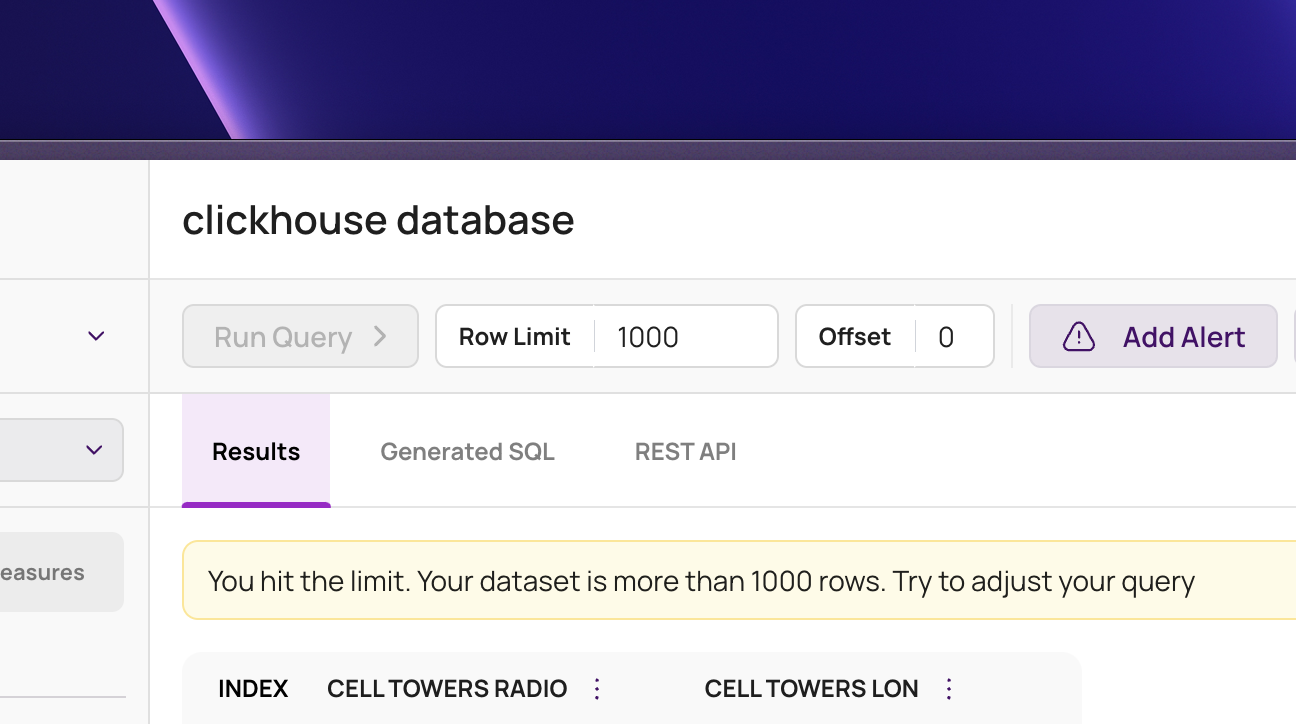
First, navigate to the Explore page to access the data for which you want to set alerts.
Follow these steps to efficiently set up your alerts:
How to Set Up an Alert
Click the "Add Alert" button on the Explore page.

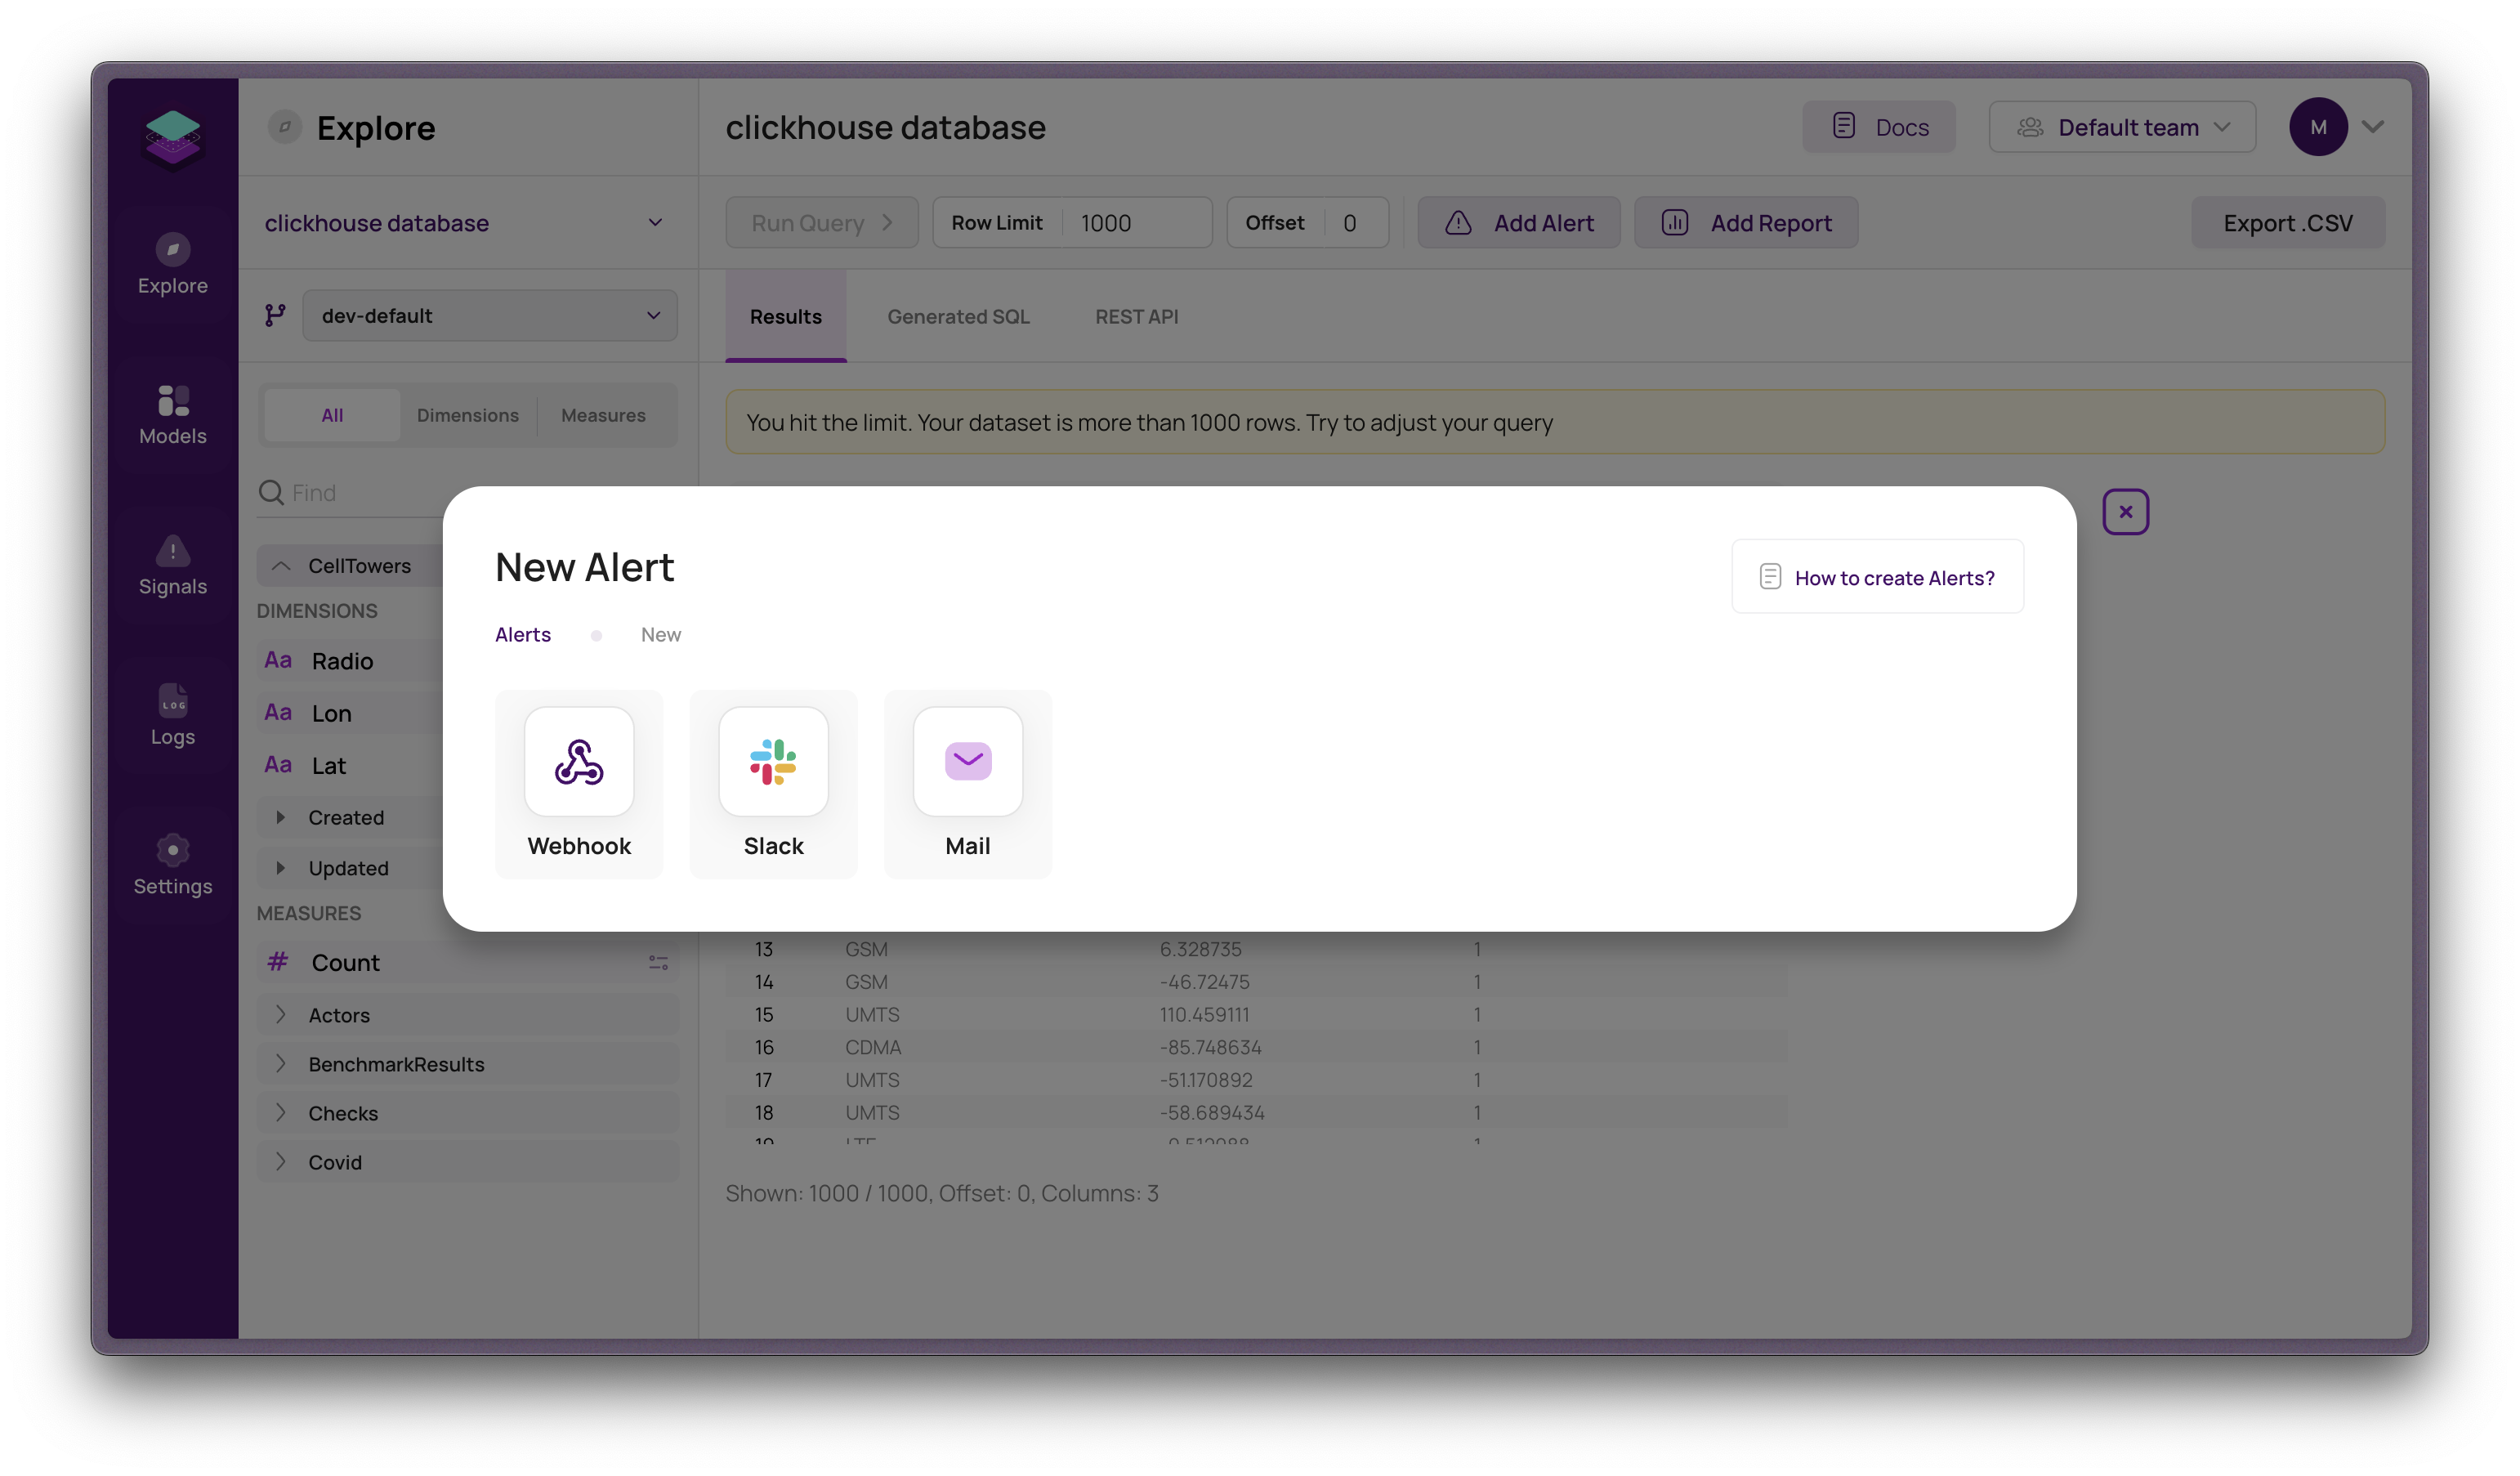
Choose your notification delivery method. Options include Webhook, Slack, or Email, depending on your system integrations and preferences.

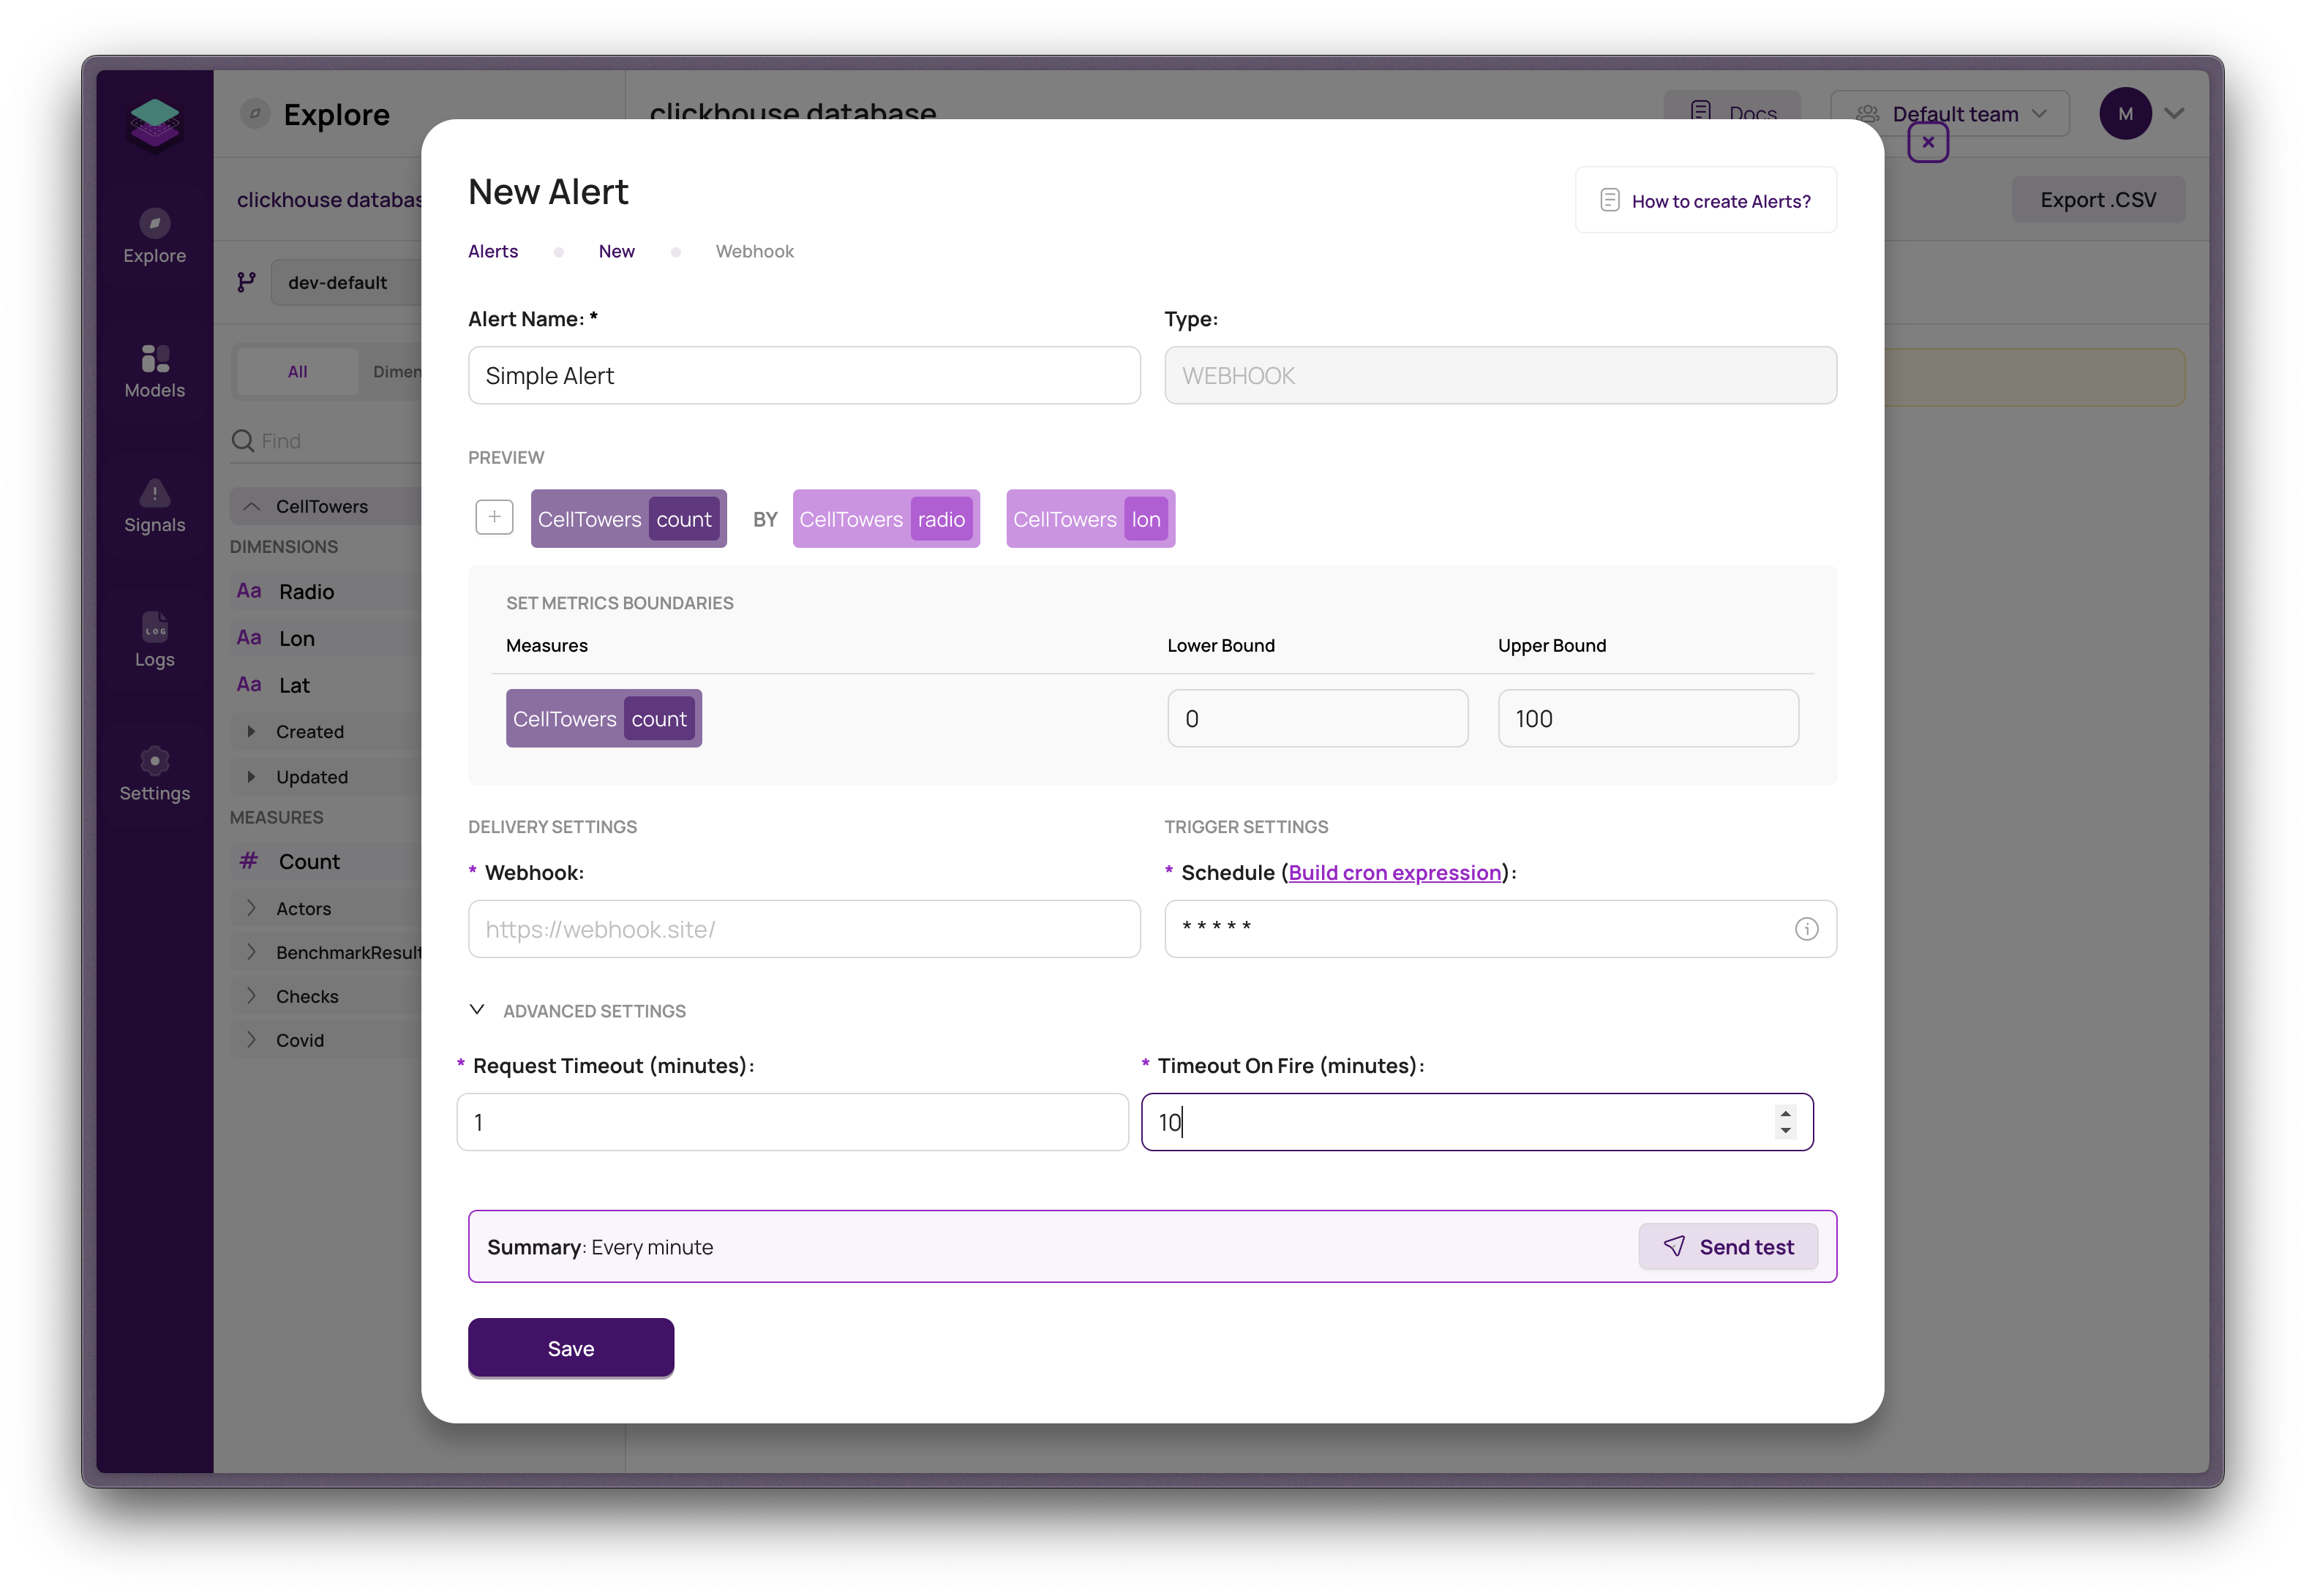
Complete the alert form with the necessary information:

Detailed Description of Form Fields on the Alerts Page:
Alert Name: Provide a descriptive name that clearly identifies the alert's purpose and content.
Preview Section:
This section offers a comprehensive overview of the Alert or Report setup. Key features include:
Query Key: This is the primary query that your alert or report is based on. It's a critical element in the monitoring process.
Measures: Select the quantitative data points you wish to track or display. These are crucial for your analysis and will be highlighted in the Preview.
Dimensions: These provide context and categorization for your data, allowing a more detailed and segmented analysis.
The Preview amalgamates all these components, offering a clear snapshot of the data and insights being monitored. This ensures that your analysis, whether for an Alert or Report, is accurate and relevant.
Trigger Settings:
Customize how and when your alert is triggered with these settings:
- Schedule: Set how often the alert conditions are checked (e.g., hourly, daily, weekly).
- Lower Bound: Define the minimum threshold that triggers the alert.
- Upper Bound: Specify the maximum threshold for triggering the alert.
- Request Timeout (minutes): Set the maximum time allowed for the data request to process.
- Timeout On Fire (minutes): Determine how long before an ongoing alert condition is considered "fired."
Delivery Settings:
Options here vary based on your chosen alert delivery method:
- Webhook: Input the URL for the webhook endpoint.
- Slack: Enter the Slack channel or user ID.
- Email: Specify the email addresses of the alert recipients.
After configuring your settings, click "Save" to activate the alert. This will commence the monitoring of your specified conditions.
Enhancements for Clarity and Efficiency:
- Clarified instructions for setting up alerts.
- Detailed descriptions for each section, ensuring comprehensive understanding.
- Streamlined language for ease of reading and comprehension.
- Added informative notes and info sections for additional clarity.